Plywood cutting boards: classification of material, tools used, work progress. How to make a cutting board from plywood with your own hands Cutting board drawings
Good day to all!
In this article, the author invites you and me to make a very useful thing that you can’t do without in the kitchen, this item is called a cutting board. The cutting board is mainly used for cutting food during the cooking process, or we simply use it as a stand for hot pans, in general, everyone uses it in their own way. Next, the author will describe the entire manufacturing process, which will be accompanied by a detailed photo report.
To make a cutting board we will need:
Tool:
Drill;
- electric jigsaw;
- file;
- sandpaper;
- roulette;
- corner ruler;
- pencil.
Material:
Oak board;
- protective oil.
Since the cutting board must be strong and serve us for a very long time, we use an oak board as a blank. You can purchase this wood material in one of the specialty stores. The width of the board that the author used is 20 cm.
A preview of what we will need in the future.
We start by sanding the surface of the board, since the wood is hard, and be patient.
Next, use a ruler to mark the future outline of the board.
The author decided to use this form.
We take an electric jigsaw and cut out a shaped part along the drawn contour.
It should turn out something like this.
In order for the board to be hung on a hook or nail, we drill a through hole on the handle of the board.
Then you need to take a file and use it to process the edge of the board.
After filing, take fine-grit sandpaper and run it over the entire surface, smoothing and rounding the sharp edges.
When you have finished sanding the part, take a rag and wipe the board from wood dust.
Next, we take a special oil called “Belinka”, which is non-toxic and can come into contact with food, and pour it into a container.
Take a brush and evenly cover the board with a thick layer of oil, then leave the board for a while so that the oil is absorbed.
After 15 - 20 minutes, you can wipe the board from the remaining oil; for this we use a napkin.
The surface of the board should acquire a more pronounced color - the texture of the wood will appear.
Next, you need to leave the board lying for a day.
After 24 hours have passed, you need to apply a second layer of oil, let the wood dry completely.
As a result of all these steps, we get this ready-to-use cutting board.
That's probably all. If you use this product carefully, the board will last a very, very long time.
Thank you all for your attention.
The cutting board has long been an interior element of kitchen decoration, i.e. one that defines her face. Self-healing silicone cutting mats are convenient, but they are fundamentally incapable of performing a defining decorative function, but a simple wooden cutting board does this perfectly well even in the simplest design. But the marketing of the “consumer society” also approaches this issue without any pretense. Do you want a tablet for 5-6 thousand rubles? Don't worry, here is the catalog, please choose. There are also more interesting models, for example, with 3D illusion effects, so please take a look. How many are there? Well... somewhere from $500. The current price is confirmed upon ordering and prepayment of 10-25% of the stated price.


It is clear to a completely foggy hedgehog that after such pricing, anyone who knows how to do something themselves immediately awakens a passionate interest in the question: how do you make a cutting board with your own hands? It’s just a board on which vegetables and meat are cut. Well, they also roll out the dough if you need a little more. And here, after researching the topic, it turns out that price markups on a seemingly simple household item, if not justified, are understandable. Because this item is also food processing equipment, incl. for preparing baby food. And after an in-depth study, it turns out that to make the simplest, purely functional cutting board, you need woodworking equipment, which an average home craftsman would not use, because it is expensive and a workshop is needed.
Tools and accessories
It's actually not all that scary. Making a cutting board with your own hands is quite possible with ordinary household tools. Incl. typesetting with 3D effects or even with photographic quality images (see below); however, monochrome, in shades of the same color. When it comes to power tools, you will often only need a drill or screwdriver; You can do without an angle grinder. Carved, decoupled and painted boards are, of course, exclusively decorative, but a functional “cool” board, i.e. a working one suitable for economic use can also be made without:
- Wires for holding together shields.
- Tabletop wood router.
- Thicknessing machine.
- Surface grinding machine (grinder).
- Horizontal cylindrical grinding machine.
The drill will need a stand that turns it into a tabletop drilling machine of normal precision. The bed can be rented; the rent is not a breakage, because The device is not expensive and is little subject to operational wear. If you already have a tabletop drill, even a poor homemade one, it will work instead of a drill - you won’t need to process large parts.
It is better to cut the blank of a simple cutting board with a jigsaw, but you can do it manually - the thickness of the material is no more than 12 mm. You need to insert a fine-toothed file into the electric one for a clean cut (sold as “for laminate”); A metal file (also sold, but more expensive) gives an even cleaner cut.
Assembly modules (lamellas) for typesetting and/or end boards (see below) are cut on a circular saw with an adjustable longitudinal saw-width limiter. The universal desktop woodworking machine UBDN-1 is perfect for this. They are also offered for rent, but the price, of course, is higher than for a drill frame. If someone you know has one, borrow it or ask to work: sawing will take no more than an hour, with smoke breaks and chatter in between.
Finally, you will need 3 (three) more simple devices that can be made “on your knees” from scrap trash, see below. To make one of them, you will need a conical abrasive cutter at an angle of 45 degrees, with a shank for a regular jaw chuck; This thing costs absolutely nothing. All this is intended to replace mechanized operations with manual ones. The work process, of course, will be lengthened, but, say, a typesetting chess board (and a similar end cutting board) using the methods described below is quite possible to make in a day on the balcony or in the same kitchen. In a living room with upholstered furniture, you still don’t need it - there will be plenty of sawdust.
Note: If you read to the end and intend to make a typesetting board with inlaid fragments, you also cannot do without a milling copying machine with a pantograph (2-plane). There is nothing you can do about it - there is a limit to every simplification. True, you can build a pantograph milling machine yourself.
Ends, set or face?

The question: what design the cutting board will be comes down to the choice: regular, from a board (lamellas) into a face, end or typesetting. Any of them provides ample opportunities for artistic solutions. In the first case, the wood fibers are located along the working surface; in an end board it is perpendicular to it, but in a typesetting board it can be this way or that way. The end cutting board is the most hygienic and durable, see figure, but technologically it is quite complex. Her artistic performance capabilities are average; in particular, 3D illusions are very difficult to achieve. It is the easiest way to make a plastic board, and the possibilities for its artistic design are very wide. For example, photographs can only be transferred onto flat boards. However, a simple cutting board is most easily cut with a knife and does not have the property of self-healing. If the board is in working order, then particles of wood and its impregnation (see below) will get into the food. Both are generally harmless, but have no use in the digestive tract.

Stacked cutting boards (in the center and on the right in the figure) are often also called end boards (on the left), because outwardly they are similar. When making typesetting boards, end fragments are combined with end fragments. Technological typesetting boards are the most difficult: simply connecting the slats according to the instructions is not enough. When designing and assembling a typesetting board, you need to take into account a number of other factors (for example, warping of wood), which can only be achieved through solid practical experience, and master the subtle techniques of woodworking to the point of automatism. In general, from an impartial perspective, $500 for a premium typesetting board is not that much.
But the possibilities for decorative design of type-setting cutting boards are extremely wide: you can use all the techniques of artistic wood processing, incl. inlay and deep relief, and transfer photos to plastic fragments. However, in terms of wear resistance, a typesetting board is no better than a plastic board. For these reasons, typesetting boards are preferred. decorative. Exception - the so-called. serving boards: table stands for pizza, French pancakes, serving pans for frying and scrambled eggs, etc.
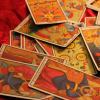
Purely decorative typesetting boards acquire another advantage that is important in this regard: their material can be anything, not necessarily suitable for food technology. This gives an amateur craftsman the opportunity to make a board with 3D effects. 3D illusions are caused not only by the shape, but also by the color tone and texture of the slats. Those boards shown at the beginning are also functional - you can at least cut bread and fruit on them; resp. their slats were made from special types of wood. But if you limit yourself only to decor, then it is possible to choose simpler materials (chipboard, laminate, linoleum, etc.), which will also create a quite decent 3D illusion. But even without visual illusions, typesetting boards made from dissimilar materials have good decorative qualities, see, for example. video:
Video: simple DIY cutting board
What not to do
There is a hidden trick in designing working (functional) cutting boards. Namely: some well-known and generally accepted design solutions are useful only in appearance.
Cutting boards are angular, on a stand and with a rebate for installing a waste collector, and with a retractable waste collector (see figure) seem to be convenient. Fashionable puzzle boards (right there) are not exactly convenient, but original. But they all have chronically dirty places: the joints of sliding/detachable parts and hidden edges. It is impossible to clean them completely from fat, juice and pieces of raw food; What's next is clear.

Another unnecessary “improvement” of the cutting board is a groove along the edge of the working surface (on the left in the figure), it supposedly collects juice. Firstly, even if you cook for yourself alone, there will be so much juice that it won’t fit in the groove; it will still leak onto the countertop, which is much easier to wipe and rinse than a small narrow groove. Secondly, by the time it comes to cleaning up after yourself, a lot of juice and fat will be absorbed into the board with the same unsanitary consequences - rancidity, rotting, rotting. Thirdly, to cut this very groove, you need a thickness planer.

In general, a working cutting board that never causes digestive problems for household members should be a simple flat piece of wood; This does not apply to the plan form (see below). The only case when some structural complication is required is a board for cleaning and cutting fish (see the drawing on the right), otherwise the entire kitchen will have to be washed from scales, juice and offal scraps. To use it for its intended purpose, place the fish cutting board in some kind of tray (baking tray, large bowl, small basin), and immediately and thoroughly wash it after use.
Materials
The next important question is the choice of material for the working board. A wooden cutting board that meets sanitary and hygienic requirements may not be made from any wood or wood materials that is sufficiently wear-resistant, and must be impregnated with a special mastic, see below. Coniferous species are clearly unsuitable: they retain resins for a long time, which are useful in the form of microimpurities of vapors in the air, but when ingested they exhibit carcinogenic properties. However, coniferous wood is the best basis for transferring photographic images, and carefully made laminated pine boards are suitable for decor in country, modern and minimalist styles, because looks good on its own, see for example. video clip:
Video: pine cutting board
Tree
For a working cutting board you need dense, fine-grained hardwood without knots, strands, cracks or signs of rot; oblique layer is acceptable. Since the board is almost always re-glued (see below), and wood of different textures and colors is required to make it decorative, you can use a trace. breeds:
- White acacia (sapwood), elm, Caucasian beech, maple, teak, ash – light. It is undesirable to use birch; it is highly susceptible to fungal diseases and color rot.
- White acacia (core), oak, hornbeam, rattan (at the ends), walnut (trunk) - darker, red-brown (acacia core), brown or light brown.
- European beech, hevea, mahogany, bog oak, walnut (burls) - dark brown or dark red-brown.
- Wenge, ebony and other tropical ebony species are almost or completely black.
- Spruce - perfectly accepts photographs, and, unlike pine and larch, on a base that is almost even in tone, because The annual rings of spruce are poorly expressed in color. However, finding a spruce block without knots is problematic.
Note: a very durable, inexpensive, purely working end cutting board is made from ash, see the story below:
Video: end cutting board made of ash
Spil
The end cutting board is not necessarily type-set. Sometimes, especially for kitchens in a rustic style (country, rustic) and primitivism, it is made from a single cut of suitable wood. Serving boards for prestigious restaurants are also in most cases made from natural saw cuts. The cut of wood for the end cutting board must satisfy the mark. requirements (see also fig.):

- The core is as small as possible; such cuts are least susceptible to radial cracking along the sapwood. In any case, the radius of the core is no more than 1/5 of the thickness of the sapwood;
- Tree rings – poorly expressed in color, thin, approx. equal width, without curls and other squiggles;
- Non-pathological wood defects (for example, scars from healed wounds) are allowed in the amount of one large and up to 3-4 small ones (no more than 2 annual rings in radius);
- A large defect can extend no more than 1/4 of the radius of the cut from the center of its core;
- Small defects should be located no further than 1/3 of the cut radius from the core.
Plywood
A cutting board made of plywood has long been a well-known budget consumer product, but for yourself with (artistic) taste, options are possible here too. The first thing, of course, is sanitation and hygiene - a board made from the best bakelized plywood is absolutely unsuitable for use as food processing equipment. Its binder is bakelite, a polymer based on cyclic hydrocarbons with phenolic groups. In some countries, the production of household electrical appliances with bakelite parts (light bulb sockets, sockets, iron handles, etc.) is now prohibited - the use of bakelite for many decades has revealed a number of its properties that negatively affect health.
Simple pine construction plywood is perfect for decorative boards for painting, decoupage, veneer inlay and transfer of photographic images - you can always cut it out of a sheet, and choose a piece without knots from the scraps. Traces of growth rings are either not visible or barely visible. Preliminary preparation - trimming along the contour; everything else is done after, see below.
For a working cutting board you need birch plywood of class Ia, Ib or II. Plywood Ia is very expensive - there are no knots or the slightest defects in its outer layer. In plywood Ib and II, captive knots are allowed. The difference is in their size and quantity per unit area. The main thing in this case is to find out (from the seller, wholesale supplier or on the manufacturer’s website) what the veneer sheets are glued with. In theory, plywood of these classes is glued only with casein glue, which is just suitable for a cutting board. But in our age, all sorts of synthetic innovations appear every now and then, and who knows how the regular entry of their microparticles into the body will affect.
Glue
The range of adhesives for gluing cutting board parts is extremely limited - these are natural carpentry glues, bone or casein glues. Casein, by the way, is the protein of milk curd. PVA has established itself as a biologically neutral substance from the outside, but what will or could happen if its microparticles systematically enter the body for a long time, such studies, as far as the author knows, have not yet been conducted by anyone.
Glue for assembling a cutting board is prepared only in a glue maker in a water bath. A board assembled with overheated and/or burnt glue will not be strong or durable. The device of the simplest homemade glue maker is shown in Fig. Two separator blanks (part A) are cut out and folded with bent teeth towards each other.

Impregnation
The cutting board, which has undergone mechanical processing and gluing, is impregnated with a special mastic. Purpose of impregnation:
- Improve the ability of wood to self-heal after cuts (only for end boards);
- Reduce the penetration of fats and product juices into solid wood;
- For saw-cut boards with bark, avoid exfoliation of the bark and its detachment;
- When transferring a photo image to the board, strengthen and secure it.
If the board is being used for wood burning, artistic painting with oil or alkyd paints, or transferring a photograph, the base is impregnated, ready for decoration. If the decor of the board is made with decoupage or painting with water-based paints (acrylic, water-dispersed), impregnation is done next to last, before drying. After impregnation, decorative boards are dried for 2-3 days before varnishing; workers before using as intended for at least a week.
According to GOST of the USSR, commercial cutting boards were treated with petroleum jelly until the entire solid wood was completely saturated. For yourself, you can use a slightly more expensive mastic, which will further increase the operational durability of the board; if it is suitable for photo transfer, then this impregnation is absolutely necessary. Its composition, calculated at approx. per 1 sq. dm boards 10-12 mm thick:
- Vaseline oil (sold in pharmacies) – 90 ml;
- Lanolin (animal wax, sold there) – 30 g;
- Turpentine – 20 ml.
Vaseline oil for a decorative board with a photo can be replaced with linseed oil (100 ml), then the picture will be brighter, but the working board will be less durable, because Over time, linseed oil dries out and discolors. Lanolin is replaced by 40 g of beeswax under the same conditions. To prepare mastic, wax is dissolved in turpentine and then oil is added.
The workpiece is impregnated generously without a brush or roller. The board is placed in a pallet on stands made of corks from PET bottles, etc. working (decorative) surface up. Mastic with the consistency of kefir is poured evenly over the surface of the board in a thin stream in increments of approx. 2 cm. When completely absorbed, pour another one across the previous pour. The pouring is repeated until the entire underside of the board becomes oily to the touch. After this, the board is dried, without removing it from the pallet, in a dry place at room temperature (no more than +30 degrees) for the time indicated above.
Design
The design of a cutting board is essentially its plan form. The design of the planes of the decorative board is whatever you want and know how to do. What you don’t need to do is make a board with one decorative side and one working side in order to hang it on a hook with the working side facing the wall: the decorative side will soon rub against the tabletop or, if carved, will become a collector of dirt.
For sanitary and hygienic reasons, the shape of the cutting board is combined from simple elements: straight lines, circular arcs and convex angles of at least 90 degrees, on the left in Fig. Small curls and deep necklines should be avoided for the same reasons, with one exception, see below. However, even such a very limited set of basic elements provides sufficient food for imagination; examples of its application in this direction on the right in Fig.

Note: For more information on cutting board shape design, see the video tutorial:
Video: cutting board shapes
Plank board
A regular (flat) wooden cutting board is made in a simple way:
- If the board is typesetting, incl. the big one is all covered (see below), a shield is rallied for it, see below;
- A board or section of a solid business board (for small cutting boards, also see below) is cut to size according to the shape and a hole is drilled for hanging. Without a drill, using a hand drill, because... its perpendicularity to the working/decorative plane does not matter much;
- The cut workpiece is polished. Without a machine, you can sand the board exactly flat on a sheet of sandpaper attached to the top of a workbench or old household item. a table that you don’t mind poking;
- Processed into profile edges. Also by hand, without a router, also see below. This simplification is possible because the total length of the edges is small and the overall labor intensity of the product does not increase excessively;
- Impregnation with mastic is carried out and the final decor is applied. What follows what, see above;
- The board is dried, and after drying it is used for its intended purpose.
Drawings of simple wooden cutting boards are shown in the figure:

At pos. 1 – standard commercial cutting board. Its functionality and ergonomics have been tested by centuries of experience, but making one at home is not so easy. The fact is that solid business boards with a width of more than 200 are rare on sale and are very expensive - after all, the trees for them must grow, if not centuries, then decades before being cut down. Wide boards are not sold at all for cutting to order - what then to do with the scraps? In addition, a cutting board requires a homogeneous workpiece - either a solid core, or solid sapwood, so in fact you need a piece of a business board with a width of 600 mm, which is generally unrealistic. So the shield for a standard cutting board will have to be assembled from longitudinal slats with dowels. Take a closer look in grocery stores - all the boards there are laid out lengthwise. And to make such a shield, you need a tabletop wood router or, in extreme cases, also a not-so-simple attachment for an angle grinder with a saw blade for cutting grooves for key joints.
Note: Linear and oval wood dowels are also often called lamellas, especially in trade practice. This introduces some confusion into the terminology, so at least for home craftsmanship it is better to accept that the key is what connects the parts, and the lamellas are the parts that are connected.
At pos. 2 – home working cutting board from a solid business board with a width of 200 mm; These are already sold everywhere. The length of its working part can be arbitrarily increased within reasonable limits, i.e. instead of size 340 maybe approx. up to 500, while maintaining the size of 80. The R8 cutouts on both sides of the handle are functional: a narrow board tends to crawl on the tabletop, because they are smooth on kitchen tables and sets. The board is held with your fingers by these cutouts. A typical grip is with the thumb and little finger, with the other 3 fingers holding the product; however, it all depends on your culinary skills.
Board at pos. 3 is the same structurally and functionally, but can also be decorative due to some pretentiousness of the form; It is made from business boards 150 mm wide, the most common. And from the boards to pos. 4, you can create a set: a large, converging one, hung on a rocker in the middle, and two smaller ones diverging on its sides.
Edge processing
Laying the profiled edges of a cutting board manually without a milling machine is done with a tool that carpenters used even before the advent of the plane - a stapler, see figure. The blank for it is a piece of a hacksaw blade for metal with a width of 15 mm. The blade must be made of solid carbon steel (one-sided black).

The cutting hole is selected with a conical abrasive cutter (remember - above?), tucked into the chuck of the drilling machine. The workpiece is clamped with a pair of clamps or wing screws on wooden blocks placed under it. Metal cannot be placed - the workpiece will burst from vibration.
Before use, the cutter is dipped in liquid machine oil, for example. spindle. A few drops of it are applied to the workpiece. You need to feed the cutter a little at a time so that it literally licks the metal, otherwise the abrasive will be erased and crumble without ever picking out the holes.
The radius of the hole is selected according to the edge profile. If you just need to round it (bottom left in the figure), the radius of the hole is 10-15 mm. If you take it ok. 4 mm and break the tool along line A-A, then in 2 steps you can place a molding (shaped chamfer) on the edge as in the bottom right in Fig. But a simple rounded edge more satisfies the requirements of sanitation and hygiene.
End typesetting
Enough has been said above about how to make a solid end cutting board from a cut of wood. A stacked end cutting board can be quite decorative without losing functionality, but it is much more difficult to make. Even to manufacture the simplest “chessboard” product in this class from rectangular lamellas, machine equipment will be required, see for example. video:
Video: end chessboard
"Chess" without a machine
However, there is a technology by which, even in ancient times, real chessboards were made without machines. The connection of the slats of such products is carried out with ordinary furniture wooden dowels from 7X20 to 8X30 using a couple of simple devices.
The first is a template tablet made of thick plywood and guide-limiters made of smooth wooden blocks, pos. 1 in Fig. below. A modern innovation, in addition to plywood, is that the tablet is covered with film (from gluing the workpieces) with a fold under the bars and a fold over them, pos. 1a. The film needs PET with a thickness of 25 microns; it goes on sale as polyethylene terephthalate, lavsan or astrolon. To prevent wrinkles on the bedding, the corner of the film between the bars is cut diagonally. Films made of PE or PVC are unsuitable: firstly, they wrinkle and wrinkle. Secondly, and most importantly, they are melted with hot glue and the workpieces stick tightly to them. The workpiece can also be glued to PET, but can be easily separated with a mounting knife.

The second device is a template for marking holes for dowels, pos. 2, because In this case, it is not possible to use a furniture pin-tapper to mark the counter sockets for dowels. The template is bent from tin or thin galvanized steel. The centering hole is located exactly at the intersection of the diagonals of the working flange of the template. There is no need to increase its diameter - the dowels will “go away”. The centers of the holes are pricked with an awl; Drilling half the length of the dowel + 1 mm is done on a drilling machine or with a drill in the bed.
The lamellas for assembling the board are sawn from timber from 50x50 on a circular saw with a longitudinal stop or UBDN-1. The sides of the timber, if rough, are trimmed using the same UBDN-1, because it also works as a jointer. You will need 5 types of slats:
- 4 things. corner (item 3 in the figure). Right or left – it doesn’t matter, because The corner slats are turned over (reversible) both lengthwise and crosswise. But the slats of diagonally opposite corners can be from different types of wood.
- Edge (edge), load-bearing and counter (item 4) – the number of pairs required to assemble the board. Each load-bearing lamella (with dowels) must have a corresponding counter lamella.
- Internal (position 5) – also the number of pairs for the entire board.
Assembly technology
The board on the tablet is assembled in rows of lamellas, starting from the edge, pos. 6 in Fig. The green arrow shows the direction of row growth; red – direction of advancing fragments. Assembly is done using glue: the dowels are glued into the load-bearing slats, and a trace is made before sliding them on. fragment, the dowel protruding from the previous one and the side of the lamella adjacent to it are also lubricated with glue. The lamellas are pushed into place and trimmed with a light hammer (50 g) using a wooden stick, because any mallet is great for such a small thing. Do not knock on the dowels, only on the edges of the slats! Each assembled row is immediately removed from the tablet and placed to dry, pos. 8.
Only “longitudinal” (horizontal in the figure) dowels are pre-glued into the slats of the middle rows, pos. 7 and 8a. “Transverse” (vertical in the figure) are glued in when the glue sets at the joints; this is approx. for bone and casein glue. 7 min. After installing the “transverse” dowels, the rows, also with gluing, are assembled into a board, pos. 9.
Rally
No matter how you tamp and trim the lamellas on the plank, the board still comes out loose and a little lopsided. Therefore, while the glue in the joints has not yet completely hardened (this is about half an hour after assembly), the board needs to be consolidated. You don’t need any money for this – we’ll make do with improvised means. It is very difficult to attach a shield to a tabletop in this way (although it is possible), but with basic general working skills, a small board can be obtained the first time.

The procedure for joining an end-mounted cutting board without a band is as follows (see also Fig.):
- The workpiece (item 1 in the figure) is wrapped in film, item. 2. Conventional PE film with a thickness of 150 microns or more is suitable in this case.
- On both sides of the board lay sheets of plywood from 20 mm (better) or furniture chipboard from 16 mm, pos. 3.
- Temporarily, using a clerical adhesive pencil or 2-sided tape, glue strips of the same plywood or laminated chipboard 1-3 mm wider than the thickness of the edges of the board onto the edges of the board, pos. 4.
- The entire package is tightly wrapped crosswise with a slightly elastic cord with a diameter of 6-8 mm, pos. 5. Cross lay propylene linen cord is best suited; This is the same motley one that is sold everywhere.
- Under the crosshairs of the winding, wooden wedges 15-20 mm thick or pointed pegs are also placed diagonally across each other on both sides. If you remember the parallelogram rule from school physics, you can independently determine that the clamping forces increase tenfold.
That's all the vibe. The tightened and wedged bag is dried for at least 2 days and sanded. If you need a common edge for the entire board, it is glued after disassembling the package and, possibly, secured with finishing (decorative) nails (which are used to nail the trim of interior doors).
Photo on the tree
Decorating a cutting board with wood burning and painting with a stencil are common techniques for decorating it, see fig. However, a board decorated in such ways loses functionality. It is clear why it is painted, but burning destroys the structure of the wood, which is why, after any impregnation, it readily accepts and firmly holds dirt and rot.

Transferring an image to wood using a photo method does not have these disadvantages; however, the service life of the board is reduced, because the picture only lasts in the upper 2-5 m of the material. But you can obtain not only line and contour images, but also halftone images. And the stroke and outline, if exposed through a metal stencil, can be made very durable - the illumination will cover up to half the thickness of the board.
The photographic method of decorating cutting boards also has, so to speak, a moral merit: it is a great gift for the hostess. Some representatives of the fair sex, having learned that you can “take a photo” on the kitchen board, excuse me, squeal with delight, and some immediately begin to figure out how to take a more seductive photo for the board.
What to shine with
Illumination (exposure) of wood as a photosensitive material is produced by ultraviolet (UV) radiation from a quartz tanning lamp or natural UV sunlight. The latter, unfortunately, is very troublesome and is only possible in the southern regions with consistently clear, fine summers and high insolation - the exhibition will take the entire warm season. Already north of approx. In Novokhopersk, the total summer insolation will drop so much that the negative will burn out before the picture transfers to the tree; it will take 3-5 years (!) to expose contours/strokes through a metal stencil in the Moscow region.
Illumination with a quartz lamp is also troublesome: the total exposure time, depending on the power of the lamp and the type of wood, will be several hours. Household quartz lamps, as a rule, can be turned on continuously for no longer than 15-20 minutes. To ensure that the resource of an expensive device does not sharply decrease, the time of one illumination session should be no more than 4-5 minutes. In total, several dozen exposure sessions will be needed, and after each of them the lamp will need to be rested according to its instructions. In addition, safety rules must be strictly observed throughout the exposure.
Precautionary measures
Excessive UV irradiation, as is known, is by no means harmless to humans and living beings in general. UV radiation has a cumulative effect: its effect accumulates in the body if the ADD (acceptable daily dose) of UV radiation is exceeded. The UV dose required for photoexposure to wood is many times higher than the UV ADL for humans.
Further, when a quartz lamp operates, ozone gas is formed, which in concentrations exceeding the minimum permissible level is extremely toxic (at the level of cyanide) and caustic, like strong acids. In addition, in an atmosphere with a high content of ozone, many substances that are harmless under normal conditions become explosive, for example. sugar, and direct irradiation of nitrogen fertilizers (nitrate, urea) with strong UV can cause their detonation.
Finally, the cylinders of professional (eg medical) UV lamps are filled with mercury vapor under excess pressure. Mercury, again as is known, is a strong poison with absolute cumulative potential. There is no DDI for mercury: all that enters the body will remain there to poison it slowly, but for sure. That is why devices containing mercury are now withdrawn from free circulation. For all these reasons, the UV photo process must be carried out strictly following the trace. precautionary measures:
- The process should be carried out in a separate non-residential area, free from any organic substances and nitrogen-containing mineral compounds.
- The UV darkroom must be equipped with forced supply and exhaust ventilation, providing at least 2 air changes per hour.
- In an apartment, UV exposure can be carried out in the summer on the balcony, provided that access to outsiders is excluded.
- If the balcony is glazed, all its windows should be wide open during exposure, and a household fan on a stand should be placed on the leeward or closest to the lamp so that the air is blown out.
- Enter a room with a UV lamp on only wearing clothing that covers the body and safety glasses; Canned safety goggles are suitable for gas welding.
- The lamp and the exposed sample must be covered with a light-proof but well-ventilated casing (placed in a box). It should be made from waste wood materials, e.g. packaging plywood - the casing is disposable; as a result of UV irradiation, its material will become unusable. The metal casing is unsuitable for technological reasons - it produces strong polarized glare, the picture is veiled, and instead of the image you get a nasty gray spot.
- You can remove the cover to check whether the exposure is sufficient (see below) only when the lamp is turned off.
- Every possible precaution must be taken to avoid breaking the lamp.
Photo process
Let's say you want to capture the birth of Aphrodite on a cutting board with a modern twist. The Titans of the Renaissance are not in danger of profanation - they are above it. But the then ideas about female beauty were very different from those of today. Perhaps because in the terrible medieval living conditions there were simply no better models. If you want, read in Dumas Papa's Ascanio where and how Benvenuto Cellini looked for a model for his Venus. But to the point.
We are looking for a suitable graphic file (item 1 in the figure). In Photoshop we adjust it to size and process it as we want and know how, pos. 2. Then we convert the picture into a negative using the Photoshop option “invert image”, pos. 3. Next, we convert the RGB image into a black-and-white halftone (in B/W or B/W mode) in Photoshop, pos. 4. This is necessary because illumination is not produced by visible light, but by UV and exposure through a color negative to the point of “smearing” the brightness balance.

Now we need an inkjet printer and a transparent film for printing transparencies and presentations. You need a printer from HP (Hewlett-Packard) or Epson. Negatives from Canon often fade before the end of the exhibition, and “Group B” brands are completely unusable. Only the original branded film is needed: Epson for Epson; to Hewlett Hewlett's. Only black ink is produced for the negative, but the cartridge must also be original branded; “Uprints”, “Printrights”, etc. Cheaper substitutes are not suitable. If all this is available or available to order, we print a negative of a size larger than the board, pos. 5. Also, to control the exposure, we print the same image in a b/w positive on matte white inkjet photo paper.
Note: Don’t even think about putting inkjet film into the laser machine! You will have to change the drum, at least one of the corotrons (discharge) and the stove! At retail prices + for repair work, it will cost a little less than a “new, good” same printer or MFP (multifunction printer-scanner-copier device).
We place the printed negative on the board so that the image is in the right place and the film covers the tree completely; on pos. 7 the handle is exposed for clarity. We attach the negative to the board on top with a pair of push pins so that the film can be unscrewed and seen what was exposed there, without fear of shifting the contours of the image (movement).
We are holding an exhibition. During each break between sessions, we remove the board from the box, place it in diffuse sunlight, and, turning off the film, compare the picture on the board with the control printout. The image on the tree will be sluggish, even paler than in pos. 8 (there the contrast is enhanced for clarity), but we need to look not at the overall tone or fascinating details, but at the fine detail in the shadows and highlights. If the development of shadows and highlights on the board and control is approx. coincide, the exposure is sufficient, and after impregnation with mastic with beeswax and linseed oil, the picture will gain juice and strength, pos. 9. You can add some contrast (a little) by heating the board after drying it with a household hairdryer.
One of the most common kitchen accessories is the cutting board. There are so many options you won’t find on the shelves of modern stores. However, with all the variety of such products, it is difficult to choose a board to suit your specific conditions. Today we will tell you how to make it with your own hands.
Wooden cutting board - a simple option
To make your own cutting board, you will need a piece of planed edged board 20-30 millimeters thick. Try to select a workpiece without visible defects - knots, wormholes, cracks, which can reduce the strength and decorative characteristics of the future product. Sawing curved edges can be conveniently done using a jigsaw with a wood saw installed.
The first stage of work is marking the workpiece
It is convenient to perform it using a pre-made template. Prepare a sheet of thick paper or thin cardboard. Bend it lengthwise and draw with a pencil an image of half of a cutting board of a complex shape. Then, without unbending the paper blank, cut out the template, cutting through both halves of the sheet at the same time. To mark the cutting board, place the resulting template on a piece of wood, press it down and trace along the outline with a pencil.

Cutting board cutting
Use a jigsaw to cut out the blanks. If there are small radius roundings, install a metal file with a smaller blade width.

Grinding
It can be done either manually or mechanically, using a grinder of one or another operating principle. To achieve maximum quality work, use sandpaper of several abrasive grain sizes, from larger to smaller.

The last stage is finishing the boards
Its purpose is to protect cutting boards during their use. Contact with wet products and cleaning untreated products under running water can lead to rot and rapid destruction of the wood. To avoid this, apply several coats of mineral oil to all surfaces, drying in between. It is convenient to carry out the coating process with a piece of lint-free durable cloth.

Remove excess finishing oil with a dry cloth. After curing the last layer for 24 hours, the products are completely ready for use.
Homemade cutting board - a more complex option
To make a more valuable version of the cutting board, you will need bars of various valuable types of wood that have a contrasting color of wood. Among the available ones, we can recommend ash, maple, birch, which have a light color, and beech, mahogany, bog oak, which have a brown or red color.

Nowadays, you can purchase similar blanks for DIY work in a number of online stores. Of course, foreign wood species, for certain reasons, have a fairly high cost, but it’s worth it.
Hard wood is difficult to process with hand carpentry tools, so it is necessary to have access to a number of machines, for example, a planer or planer, as well as a circular saw. In addition, we will need shield clamps or clamps.
Making a shield
To make a typesetting cutting board, you should prepare an even number of bars in light shades and an odd number of dark ones. Pass the workpieces through a surface planer until the pieces are of equal width. Their thickness can be different - this will give the entire product an original look. Pre-place the parts in a cassette to select their optimal relative position. Then turn the bars over onto one of the edges and apply glue. For our product, select a high-quality moisture-resistant wood binder.

Lay the parts with glued edges to each other and clamp them in screw or lever clamps.


To avoid warping of the future shield, place auxiliary bars of sufficient thickness on both planes of the product and press them with clamps.

After the adhesive layer has completely dried, usually within a day, release the workpiece from the clamping fixtures and remove excess glue using a chisel.

After mechanical grinding, it is quite possible to use the product in this form, but we suggest you make it more original.
Making a chess pattern
We transfer the polished shield to a circular saw and saw it across the bars into separate parts 25-30 millimeters thick.

We assemble the set and arrange the resulting parts so that light parts alternate with dark ones.

In the future, we proceed in accordance with the technology described above - we lubricate the edges of the parts with glue, clamp the product in clamps and glue them into a shield.

After the glue has completely dried, carefully sand the finished product with sandpaper of various grain sizes from coarse to fine. To protect the product from moisture and enhance the color of the wood, be sure to treat the cutting board with mineral oils.
By selecting bars of various thicknesses and shapes, experimenting with different shades of wood from different species, you can obtain an unlimited number of different options for the same product - a cutting board.
Dear readers, if you have any questions, please ask them using the form below. We will be glad to communicate with you;)
One of the most important kitchen appliances is the cutting board. This accessory is very important for a real housewife; it is used for cutting almost all types of products: vegetables, fruits, meat, sausages and confectionery. Some types of cutting boards are even used as a stand for pots and pans, or as a serving device on a holiday table. Therefore, it should not only be comfortable and strong, but also attractive and pleasant to the touch.
Types of materials
Today, stores selling kitchen utensils offer a huge range of cutting boards made from various materials: silicone, plastic, stone, ceramics, glass and, of course, wood. Let's look at the advantages and disadvantages of each material separately.
Stone
Products made from marble, granite and other stones look very impressive. But you should know that, for example, marble cannot withstand high temperatures and treatment with acidic detergents. But the marble surface has bactericidal properties and is capable of killing harmful bacteria.
Most often, granite or marble is used to make boards.
Boards and stones are great for rolling out dough and making pastries. They are durable and have many positive properties.
Plastic
Plastic items are always famous for their long service life, but it should be understood that plastic cannot withstand any high temperatures at all and can melt upon any contact with fire. In addition, it is very unfavorable for the body and is capable of storing a large number of microbes on its surface.
Silicone
This material does not dull knives, unlike others. In addition, it is convenient to store, as its flexibility allows you to roll the board. Silicone can withstand both low and high temperatures, but should not be washed with acidic detergents.
Glass ceramics
This material is very durable, it can be easily washed, it can withstand any temperature and is not able to absorb food odors. The main disadvantage of glass ceramics, as well as ceramics and glass, is that these materials dull kitchen knives. For this reason, such boards are very beautiful, and they can complement the interior of the kitchen.
Tree
Of course, the most popular material for making cutting boards. Wood should not be washed in dishwashers, but can be easily washed by hand. Wood is a durable material, and it is indispensable for professionals. It not only helps to cut food efficiently, but also does not dull kitchen knives.
Types of wooden boards

A wooden cutting board may not be a kitchen utensil, but a decorative element.
Today the market offers a wide range of varieties of wooden cutting boards. Here is just a small list of types of wooden boards:
- Classic, there are prototypes of it with a metal or plastic edging, as well as a compartment for a kitchen knife;
- Retractable - built into the kitchen furniture and pulled out if necessary, for example from under the countertop;
- A board with a plate is very convenient, because after finishing cutting food, you just need to move the pieces into a plate with a kitchen knife.
Of course, complex designs are difficult to make with your own hands, but any owner can make a classic kitchen device for cutting food on their own.
Making a wooden board
The simplest version of a cutting board, made by yourself, is using a material such as plywood. This material is convenient to use, practical, easy to clean and quite durable. In order to make such a product with your own hands, you need a certain tool:
- Pencil;
- Sample;
- Hacksaw and workbench;
- Drill and drill;
- Files and sandpaper;
- Vise.

The most important thing is to make the correct drawing, and only then use it to make a template, after which you can start working. Before making a wooden cutting board, evaluate your work, whether you have time, and whether it would be easier to purchase a finished product in a store.
Work plan:
- We prepare a wooden board, preferably from hardwood, without knots and burrs. If necessary, remove burrs with a wood plane.
- We make markings with a pencil on the workpiece in accordance with a pre-prepared template.
Using a hacksaw and a workbench, we cut out the product according to the template. In the required place we make holes for mounting on the wall using a drill and a drill bit. - Having clamped the product in a vice, use a file and sandpaper to clean its surface.
- We treat the board, made by ourselves, with varnish on the outside, where you can also apply a design, including one made with a chisel.
- To make a cutting utensil on a stand, we simply attach two legs to a classic board, and make a cutout on one side in order to place a plate and not drop the pieces when moving them with a kitchen knife. In any case, a DIY wooden cutting board will always please the eye and soul.
Kitchen appliances such as cutting boards look very beautiful in the interior if they are kept clean, tidy and following certain rules.

Proper care will increase the life of the board and maintain its attractive appearance for a long time.
Here are some useful tips that will allow you to turn it into a useful interior element:
- If you make only one side of a wooden board work, then the second can be used as the front side when stored in the kitchen. Thus, guests will only see one side, which can be decorated, painted, pasted over with a pattern, and so on, it all depends on your imagination.
- It’s good when the appearance and type of material are selected in accordance with the overall interior of the kitchen, for example, in modern kitchens, you can use minimalist boards, in houses with children in the shape of animals, and so on.
- Choose the wood you use to make your product responsibly. Conifers can release resins, and oak, for example, is too heavy. Birch, beech, and acacia are best suited.
- Do not wash wood boards in dishwashers; it is better to wash them by hand under the tap. And once every couple of weeks, wash the device with a vinegar solution.
- The device should be cleaned every time after slicing food, especially wash after slicing fish and meat.
- If you cook a lot with different ingredients, you can keep a whole set of boards in the kitchen.
- If you take care of your cutting board, it will serve you for a long time and will perfectly complement your interior. The main thing is to wash its surface in time to prevent germs from multiplying.
 A cutting board is an indispensable attribute of any kitchen. Boards can be both professional (for example, for catering establishments) and household. They differ in shape, size, and material from which they are made. But the most popular were and remain wooden cutting boards. To make a cutting board from (and it is not at all difficult), it is enough to know some simple rules.
Firstly, not all wood is suitable for making a cutting board. One material absorbs moisture faster, the other is practically “moisture resistant”. Wood may have a tendency to split. And different types of wood differ from each other in hardness.
In order to make a board for the kitchen, such species as oak, pine, and birch are suitable. Boards are made from beech and acacia. There are also more expensive species (for example, Hevea), but this is not for everyone. The simplest cutting board can be made even from a sheet of plywood.
Rules for making a cutting board
The method of making a board, regardless of the material chosen, is the same. First, the board is marked depending on the shape and required dimensions - here everyone uses their imagination. For ease of use, do not forget about the handle. The handle should be located strictly on the longitudinal axis of the board, so you need to carefully measure and determine this axis.

The board itself and the handle are cut out with a hacksaw or jigsaw. Don't forget about the corners and curves around the handle. They need to be carefully ground down, rounded with a file, sanded - whoever has what. And it's not just that you can get hurt. Small pieces of wood left after sawing can then break off and get into food, and then into the esophagus. And this can already be dangerous.
Next, using the same sandpaper, you need to process the entire surface, paying special attention to the ends. It is better to round right corners of the surface. If you made a handle, don't forget to drill a hole in it. Then the board can be stored hanging in a place convenient for you.
It is necessary to take into account that the wood becomes covered with microcracks, and food waste residues accumulate in them. Therefore, the cutting board must be washed and dried very carefully after each use. It is good to lubricate the board with paraffin, after slightly heating both the board and the paraffin. Wax is also used for such “sealing” of cracks.
Important!
- When making a board, consider not only its surface area, but also its weight.
- And another useful tip - it’s better to have your own cutting board for each type of product.
The process of making a cutting board in the video:
Read also...
- Federal State Budgetary Institution “National Medical Research Center for Psychiatry and Neurology named after V.
- Is it possible to legally avoid paying transport tax?
- Recipes for healthy dishes and drinks made from lingonberries
- Military registration Sample order on the organization of military registration