Garden path made from plastic bottle caps. Master class with photos. Paths from plastic bottles and their caps
Many people believe that to decorate a summer cottage you simply need to have a lot of money. Indeed, modern building materials are very expensive, especially considering that today many residents are faced with a crisis that forces them to save every penny of their income. Fortunately, there is a way out of almost any situation, and this case is no exception. More and more often you can find summer cottages that are decorated using improvised means. Many resources that are often used in decorating are thrown away by people without even realizing that these things are irreplaceable.
You can also often come across an opinion, the essence of which is the unacceptability of using “garbage” as decorative elements. In reality, everything depends on the result. If with the help of certain things you can create a pleasant atmosphere, then you don’t need to look for anything better.
Features of using bottle caps
Plastic bottles, despite their simplicity, are very often used for other purposes. From the bottle itself you can create various watering cans, baskets, vases and many other things. However, in in this case we will talk specifically about lids, which are much less often used when creating various crafts.
Considering that plastic stoppers different from bottles high strength and resistance to deformation, they can even be used as coatings. Creating a path from traffic jams - not an easy process, however, it will significantly save money, since most often the tracks on summer cottage lined ceramic tiles or paving stones.
Before starting the process, it is worth noting that in this case a lot of plugs will be required. If the family regularly purchases carbonated water in plastic bottles, then after a few months you can easily collect required quantity lids.
It is also advisable to use corks during the process. different colors. This will allow you to create original patterns or entire compositions. If all the corks are the same color, you shouldn’t be upset, as this will only simplify the process of creating paths.
Construction materials and tools
Many might think that our path will consist exclusively of traffic jams, but in the process we will need a lot building materials and tools, including:
- sand;
- cement;
- tile adhesive;
- boards;
- shovel;
- hammer;
- ruler;
- roulette.
Before starting the main process, you need to thoroughly wash the plugs and dry them.

The process of creating a traffic jam path
First, we will have to create a territory marking. This will allow you to fully assess the dimensions of the track, as well as find problem areas. As for the misfortunes that may arise in the process of creating a path, this could be loose soil, or the presence of heavy and massive stones on the perimeter of the path, which one person will not be able to move.
The traffic jam road must be quite narrow. Perfect option- around 70 cm. If the path will be used for moving small loads (vegetables, building materials), the width of the road should be increased.
After this, you need to remove the layer of turf, as well as get rid of all stones and large plants that could affect the flatness of the path. As already mentioned, you need to take especially seriously loose soil, which can collapse under the slightest load and damage the path.

Using a shovel you need to dig a trench. Its depth will be very small - up to 15 cm. After which you need to compact the soil as much as possible. If the soil sags in some areas, you need to arm yourself with crushed stone and fill all the flaws with it.
The entire volume of the trench must be filled with fine crushed stone. And here again you will have to compact the material and make sure that the crushed stone is evenly distributed throughout the entire trench. If coarse material was used at the very beginning, the space between the stones can be eliminated using fine-grained crushed stone.
We fill everything with sand on top so that the crushed stone is not visible at all. Despite this, the sand layer should be minimal. After the next compaction, the sand is watered.
Next comes the most crucial moment - installing traffic jams. The covers are pressed into the sand to such a depth that they do not fall out when walking along the path. The plugs should press against each other. Ultimately, if everything is done correctly, we get an almost monolithic surface. When walking, the plugs will be pressed in more.
On the sides of the tropics you can make a small decorative border. Most often it is made from plastic bottles, cut in half. In this case, the halves of the bottles are simply pressed into the ground.
Concrete-based cork path
In some cases, a track based sand mortar may seem too unreliable for many. Indeed, after heavy rains it may become slightly damaged, especially if the soil had some problem areas.
In this case, it is recommended to use concrete mortar. By by and large the technology remains approximately the same as in the previous case. We need to dig a trench, compact it, and fill it with gravel. After this it is created concrete layer, which includes cement, sand and fine crushed stone. After pouring the concrete, the plugs need to be pressed again, but this time into the solution. Everything should be done very quickly, because fresh air concrete gains strength very quickly.
To date this option the most optimal also for the reason that various dyes and plasticizers can be added to concrete. This will allow you to create a truly chic decorative composition. At the same time, we should not forget that the path of traffic jams is a budget option for those who want to save on the purchase of expensive building materials. In most cases, corks cannot replace a full tile covering.
DIY garden path made of lids for children. Master class with photos
Efimova Alla Ivanovna, teacher of GBDOU No. 43, Kolpino St. PetersburgDescription: The work can be done with children over 8 years old, with the help and guidance of an adult. The material can be useful to anyone who is interested in creativity and loves gardening.
Purpose: the work will serve as an excellent decoration garden plot, will create a wonderful mood.
Target: creating a beautiful and unusual path.
Tasks:
-teach children how to create paths using cement mortar;
-introduce the process of mixing cement mortar;
-develop imagination and imagination;
- to cultivate love and interest in nature, creativity in all its manifestations.
Hello, dear guests! Today I want to talk about how you can create a beautiful and unique path on your site using available materials. For a long time we hatched a plan to build a path, since we needed to accumulate material, which we decided to use. We saved all winter. We all drink a lot of water, lemonades, juices, and we save or throw away bottle caps. But in our case, we saved.
We accumulated lids and decided to use them to line the path to our small pond in the country. This is our first work in this technique, but I think not the last. I have a lot of ideas and I really want to bring them to life.
Materials and tools:
-sand, eurocement, water;
- a bucket for mixing cement mortar;
- Master OK;
-2 mayonnaise buckets (container for measuring cement, sand and water);
-perforator and mixer for concrete;
- bottle caps;
-shovel.

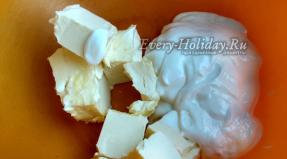
Cement mortar: For 1 bucket (from mayonnaise) of eurocement we will need 4 buckets of sand, 1.25 buckets of water.. The sand must be sifted, or just by hand, and that’s exactly what I did, remove large stones, sift the sand through your fingers. When all the ingredients are poured into the container, they must be mixed using a hammer drill with a concrete mixer screwed into it, literally 7-10 minutes, until smooth. My solution was mixed in a concrete mixer, as my husband was pouring the foundation for the fence, and my son and I quietly decided to lay out a path.
Progress of the master class:
We already had a pond on the site, and there was a path to it, but it was an ordinary one made of crushed stone. First of all, we need to decide on the place where we will place our path, draw or dig (as I did) the place of the path, remove the rubble to the side and get to work.

First, let's arrange our caps by color.

The path has been drawn, we can begin. We decided to line the edges of our path with red covers. We need to first lay out some cement and quickly, before the cement hardens, we begin to lay out the path.


Then we decided to lay out three rows next to the red row green- this is our grass.

The son suggested laying out a couple of trees, the trunks were lined with brown corks
(also a little cement first and lay out the lids).

Then the idea was born to lay out the house, since summer was in the yard, they decided to lay out the sun to heat the path. They decided to make the frame of the house out of red lids, the windows and roof were yellow. yellow color. The sky was covered with blue lids.


Then we begin to fill the empty space between the rays of the sun, we decided to put white lids on one side and blue on the other side. Of course, you can leave it like that, but we wanted to continue.

Let's start filling the space between the trees. We tried to lay out flowers and this is what happened.


We fill all the remaining space as your heart desires.

Our path is ready, I think it turned out not bad. Thank you all for your attention.


You can post any drawing, as long as you have enough material and imagination. We wish you to continue our work, summer mood, beautiful summer ideas, and most importantly, bring these ideas to life.
We wish everyone summer, warmth and comfort.
I draw summer
P. Pranuza
I paint summer -
What color?
Red paint -
Sun,
There are roses on the lawns,
And green is the field,
There are mowings in the meadows.
Blue paint - the sky
And the stream is singing.
What kind of paint?
Will I leave the cloud?
I paint summer -
It's very difficult...

Rustic hand-made

Let me delve into the domain of our beauty expert - Orange Tie - and talk about the features of rustic design. Recently I was visiting relatives in the village of Yarkovo, Tyumen region, and was shocked by the creative creations of a local resident, Uncle Misha: a former prosecutor, and now a pensioner, creates paintings from plastic bottle caps.
Why not hand-made?
Any trash can be found successful application. Designers sew bags from old newspapers and dresses from tax returns, so why not make a picture out of corks? 
The rural artist has them everywhere: on the doors of the bathhouse, barn, toilet, inside fence and gate. 
He would decorate the house and the street gate, but his wife is categorically against it. 
Having learned about the pensioner’s hobby, they bring him new corks, throw them under the fence, send them by mail, and on holidays he receives parcels with corks from relatives in Moscow. 
It is clear that the pensioner’s drawings are unlikely to appear in museums around the world. Creating masterpieces requires practice, even more corks and nails; it is advisable to come up with a concept in advance. 
But the idea of using traffic jams for peaceful purposes seems promising to me: recycling waste plus realizing creative potential. I wouldn't mind if on mine country house a similar pattern appeared. And you?
Photo: Galya Wood
http://f5.ru/galyavud/post/77883
Panel made of corks
http://stranamasterov.ru/node/134240
![]()
http://stranamasterov.ru/node/195172
Rugs.
Http://stranamasterov.ru/node/147044 ![]()

It is not education, but talent that makes an artist real. Bratsk resident Nikolai Petryakov creates paintings from plastic corks. 
Cork mosaic is a troublesome task. Just preparing the material for unusual paintings takes several hours, says master Nikolai Petryakov. First remove all excess, first rinse, then select by color. It's like embroidery. Only instead of canvas there is a bathhouse wall, and instead of threads there are colored plastic plugs. 
I draw 30 mm into squares. Where are the black dots I mark. Where the brown ones are, I put crosses. First you prepare the plugs, then you hammer them in,” says Nikolai Petryakov, a resident of Bratsk. 
This summer the summer resident has a creative anniversary. Five years since he mastered the art of cork. During this time, not only neighbors learned about Nikolai Petryakov’s unusual hobby. People from other cities come to take pictures with traffic jam paintings. Everyone is sure: the author of the works is a professional artist. But Nikolai Pavlovich has no special education. And recently he calculated how many traffic jams he collected over 5 years of creativity. It turned out to be almost 40 thousand pieces.
It happened that bottles with expired mineral water“So my family and I collected a whole bucket,” says Bratsk resident Nikolai Petryakov 

There is creative potential, but there is not enough material. Because of this, work on the painting he is currently finishing is delayed. Black, green and brown corks are in short supply. But, despite everything, the summer resident has grandiose plans - after all, there is one more free wall of the house.
http://ideidetsploshad.info/publ/stati_o_dploshhadkakh/plastikovye_butylki/nikolaj_petrjakov_sozdaet_kartiny_iz_plastikovykh_probok_bratsk_irkutskaja_oblast/25-1-0-475
A path made from plastic bottle caps.


In the hands of home craftsmen, plastic bottles are transformed from recyclable materials into creative and useful things: flower pots and pots, lamps and decorative figurines. They found practical use and during the arrangement local area. For example, dacha paths made from plastic bottles look stylish and original in landscape decor. The process of turning eggplants into road surfaces is simple and does not require construction skills or the purchase of expensive store-bought materials. All you need is free time, patience and plastic containers.
Pros and cons of plastic for paving paths
Any material has negative and positive sides, plastic container- is no exception, but as a road surface it has proven itself with the best side:
- this is the most cheap material;
- It has long term service (does not rot, does not corrode);
- a varied color palette allows you to lay out all kinds of patterns;
- the color does not fade;
- dense placement of containers in the ground does not give a chance to weeds;
- The natural bulges and irregularities of bottles work well as massage mat;
- serves excellent stylish decoration, which you can be proud of.

Garden path made from whole bottles
There are few disadvantages of plastic flooring:
- when the soil freezes and thaws, its natural deformation occurs, as a result of which the bottle rows also shift, so they need to be leveled from time to time;
- rain and frost make plastic slippery.
Options for placing bottles in a path
Road work with plastic bottles is carried out in three ways:
- When arranging a plastic path for a summer residence, whole containers are used.
- Bottoms cut from eggplants are used as laying material.
- Decorative stitching is constructed from plastic caps.

Foundation arrangement
Arrangement of paths from whole bottles
When performing this work, large bottles must be planted in the ground so that they do not move. Then you will get a reliable and durable path for your garden, because plastic garden flooring can go into the ground or creep away under the weight of your feet. Therefore, before laying the bottles in the ground, you need to carry out a series of preparatory work:
- Since empty plastic containers easily wrinkle and crack, fill all bottles with sand or gravel (you can pre-fill them with paint to diversify color palette).
- At the site of the future path, dig a trench with 1.5 blade bayonets. Install formwork from boards along its perimeter. Fill the internal space broken brick, crushed stone, sticks, dry leaves. This “foundation” will be the solid foundation that will prevent the path from “sagging.”
- Cover the “foundation” with soil. Compact.
- Pour a 2-3 cm layer of sand. Compact.
Now you can place the prepared bottles in the sand cushion. They are laid horizontally, with their necks towards the edge of the path, or vertically, with their necks deep into the ground. You need to walk on top of the bottles (after placing a flat board) to press them evenly into the sand.
Dry sand and cement (1:1) are used as the final fastening base. The mixture is poured into the remaining spaces between the bottles, compacted with a board and watered. Once dry, it will securely hold all the components together. Instead of the removed formwork, the edges of the path are covered decorative stones or bury the remaining plastic bottles.

Option for a garden path made from bottoms
A method for constructing a path using bottle bottoms
The road surface can be made from individual parts of plastic bottles, for example, from the bottoms (the bottom part of the bottle cut off by 1/5). They are also placed in a prepared trench, consisting of formwork, a foundation base and a sand cushion. The bottoms are pressed into wet sand and covered sand-cement mixture, tamp, water to set the cement. The formwork is removed and curbs are built.
Instead of a sand cushion, you can fill the trench with a cement cushion (it should not be liquid) and lay the bottoms in a wet solution. The strength characteristics of such a track will be higher.
If you also deepen the lids in the spaces between the bottoms, you will get bright, continuous paving stones.

Mosaic of colorful lids
Panel path made of lids
Bottle caps have a small degree of penetration, so to hold them firmly on the surface, a special mixture of cement, sand and ceramic glue (1:3:1) is prepared. The bottom of the trench is covered with crushed stone, non-liquid is poured on top cement mortar, into which the lids are pressed.
Such paths have an original mosaic appearance, but beautiful pattern It won't happen spontaneously. This work requires thoughtful preliminary calculations, perhaps sketches of the layout of how to position the lids. Fragments of the future canvas can be assembled in advance by fastening the covers into a pattern using an awl and fishing line.

Connecting the covers with fishing line
Despite the fact that each of the above installation methods is simple, the practicality and beauty of the path depends on the correct execution of individual stages. Knowing and following the nuances will help you avoid unpleasant surprises. Therefore, if you have the opportunity to consult with a practitioner, take advantage of it before starting work.
Where else can your imagination unfold if not at the dacha. Here the abilities of a housewife are demonstrated in all their glory. Moreover, it is often not necessary for this large investments. There is so much material around that is practically thrown into the street. Empty bottles and their corks are firmly in first place here. Decorations for the garden are not only beautiful, but also very cheap.
And how much joy they can bring to children and adults. A plastic bottle works 100%. The lids will make beautiful panels on the wall of the house. Can be done original tracks from plastic bottle caps in the garden or lay out a beautiful area near the house. Can be arranged for a child sports section, where he will not only play, but also receive a boost of energy. The covers can be used to create a path with obstacles. It is better to lay them smooth side down, leaving the ribs on top. In this version it turns out good massage for children's feet. Paths made from plastic bottle caps turn out to be very beautiful if you create a pattern by selecting harmonious combinations colors.

True, there is one condition here. There should be a lot of prepared material, and it’s difficult to cope with this problem alone. You need to connect your friends and acquaintances to collect the required amount. It may take several years to collect the material. But how pleasant it will be to warm the soul if you make it with your own hands. Photos taken during the warm season will allow you to remember a pleasant trifle even in winter. Collecting corks takes a long time because their sizes are small, so you can come up with another option. For example, make paths from plastic bottles. There are several technologies that you can use. If you want to use the entire bottle, then it is better to make a border out of them, thus defining the shape of the path. For this purpose, we dig a shallow narrow groove on the sides of the path. We place bottles tightly in it, neck down, along the entire route. Then we return the earth to its place and compact everything around. If the land at your dacha is good, then you can stop at this stage.

If clay predominates, then it is better to do inner part paths made from plastic bottle caps. Or combine all parts of the bottles. The tropics created from plastic bottoms look very beautiful on the site. To do this, you need to cut off the bottom of the bottle by 1/5 of its height. Leave the top for blanks that can be used to create plastic palm tree. To ensure that tracks made from corks or bottle bottoms keep their shape well, it is advisable to prepare a base. If you follow all the recommendations, then you first need to pour crushed stone, compact it well and add coarse sand on top. Having created a dense pillow, you can lay out a pattern of paths from plastic bottle caps. This, of course, is a very labor-intensive process, but what a beautiful plot it turns out to be. If you want to do more durable coating, then it is better to lay the plugs on a prepared concrete base. But this must be done quickly, before the cement sets. You can also use metal plugs. They also fit well and can serve as decoration.