How to dilute acrylic paint. How to paint a ceiling with acrylic paint - technology It is not afraid of dirt and does not let in moisture, while allowing air to pass through
Today, to express your “I” with the help of color and light, there are many people (professionals and amateurs from painting) who are ready to teach you drawing lessons. The lessons are laid out step by step both on YouTube and in various articles on the Internet, where they will tell you in detail and easily how to learn to draw, show you accessible techniques for painting with different paints on different canvases, and at the same time tell you what painting styles are accepted by artists.
By the way, an artist will never say about his work: “I drew!” Artists paint pictures like a musician writes music, where every note is like a stroke of a master’s brush.
Try and become a master of your feelings and emotions, pick up your brushes, open your paints, stand in front of the canvas and start painting!

The most common are gouache and watercolor; a person becomes familiar with them in early childhood. Oil paints require a more respectful attitude; they are applied tightly to the canvas, in several opaque layers, and take a very long time to dry.

And there are paints that combine the ease of use of gouache and the oily density of “serious” paints. These paints are diluted with water, dry quickly, which allows you to apply them layer by layer without the risk of spoiling the drawing, and after drying they do not fade or change color. Moreover, they are also waterproof (after drying, of course) and absolutely hypoallergenic! These are liquid acrylic paints.
You will object that you have already become acquainted with acrylic paints when you carried out repair and construction work in own home, and you know for sure that acrylic is liquid plastic, polymer. Right. This means that you already know the properties of acrylic and are aware that this polymer easily adheres to wood and glass, fabric and plaster, let alone canvas and cardboard! You also know that in addition to weather resistance, you can create volumes with acrylic paint, which is why many artists use acrylic paints for painting volumetric paintings to give them sculptural relief on a flat canvas.
Check out Justin Gaffey's acrylic paintings.

Impressive? But he is self-taught! And I also once faced a choice: “What colors are best for a beginning artist to paint?” — and settled on colored polymers.
It must be said that working with acrylic allows you to use both traditional painting techniques and various modernist “tricks”; it allows you to mix styles and techniques, which will make your paintings more interesting and emotional. But acrylic paints also have their own characteristics; you need to know how to handle acrylic paints.
Basic techniques when working with acrylic
- Wet. The diluted paint is applied to a canvas moistened with water. It is somewhat reminiscent of working with watercolors.

- Dry. You will need several brushes to edit the strokes on the canvas “dry”.

- Glaze. This technique involves the formation of a pattern from thin translucent layers. By adding layers step by step, we get beautiful iridescent colors that give our painting a richness and sophisticated mood.

- Impasto. Very similar to working with oil paints in pastose technique. Dense, opaque paste layers applied with a flat brush or palette knife (something like a small spatula) can create relief. Impasto is a special drawing technique, completely opposite to the glazing technique!

What might you need for drawing?
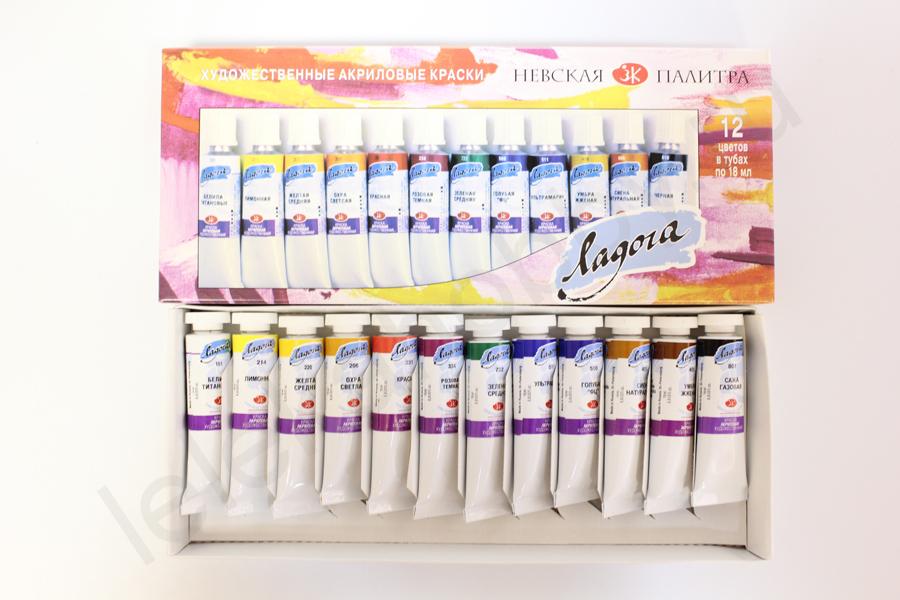
First of all, the artistic acrylic paints themselves. If you doubt your ability to mix different paints or are afraid of not getting “in color” when applying color, then it is better to use ready-made paint palettes, since acrylic paints are now available in about 130 colors both in tubes (tubes) and in small plastic jars -containers.
If you are just starting to paint with acrylic paints, so to speak, taking courses for beginners, try your hand as an artist with basic undiluted colors: white - black, red - blue, yellow - green, brown.
And don't take it right away complex work, buy a regular one children's album for coloring, and try to color any picture using your favorite acrylic painting technique.

This is good practice for beginners - once you learn to work in small areas, you will understand how to use acrylic paints when painting large canvases. It is important to remember when using acrylic paints that they dry very quickly and cannot be left open!
What else you will need:
- Long brushes made of natural and synthetic hair - flat and round in different numbers. Plastic pile will be needed when working with undiluted acrylic; natural “column” or “squirrel” - for watercolor techniques.
- A set of palette knives of different sizes. A palette knife is a device that artists use to clean the palette and apply thick paints to the canvas. A kind of trowel knife made of flexible steel strip or thick plastic.
- bottle with clean water(preferably warm). You also need a spray bottle for wetting. work surface so that the acrylic paint adheres better to the canvas.
- Palette. You will place some paint on it for convenience or mix paints with each other, using some as dyes or colors for others. It is very convenient and economical to use ordinary disposable plastic trays or plates. You can purchase or make a palette that will retain moisture in the paint. The whole secret is two types of paper. The first, bottom layer is one that absorbs water and is therefore always wet, the second is parchment that covers the paint on top.
- Retarder (thinner) for acrylic paints. It will not allow a polymer film to quickly form, and will make it possible to more carefully work out the drawing on paper or canvas for drawing. This “addition” will also increase the ability to spread and shade the paint and make it a little brighter. You can apply it directly into the paint, or simply on a brush. How to use them correctly is written in the instructions for use.
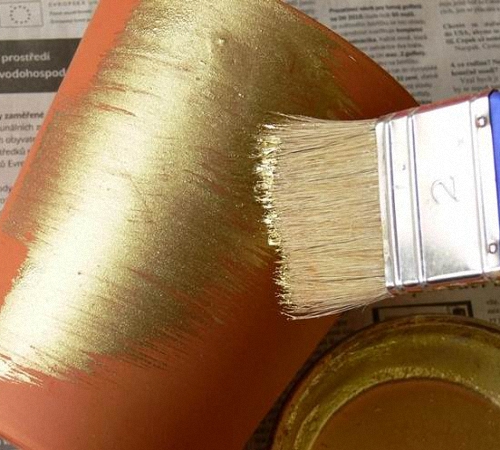
How to paint with acrylic paints using a palette knife? Just like with oil, applying thick paint in even layers or in a relief stroke.

Having understood the peculiarity of such application and having learned to work with a palette knife, you will appreciate its wide capabilities and will be able to work with polymer paints on wood or canvas, and even give a master class to beginners on how to use it correctly in their work so that a painting with acrylic paints turns out not only bright, but also bas-relief volumetric.
Among other things, you need to prepare:
- a large volume of water in a deep container for washing brushes;
- paper or cloth napkins and towels;
- sandpaper with grit P120;
- felt-tip pens, markers, gel pens or chanting (a glass or copper tube with a thin spout for applying fine contour lines) to complete the drawing;
- decoupage glue;
- An airbrush can also be used if you are sure that you are using it correctly and the acrylic paint is diluted in the proper proportion;
- and, of course, the basis for painting with acrylic paints.
On video: painting space with acrylic.
Preparing the base
The basis can be anything that requires your attention in artistic transformation: a piece of cardboard, a plywood board, a canvas on a board or an easel stretched on a stretcher.

Is it possible to make your own canvas to paint on? Yes. And even necessary! The law is simple: when we learn to draw, we learn to make a canvas for drawing on our own. For example, the basis for a future masterpiece will be wooden plank. How to make sure that the polymer of acrylic paints can easily “catch” and not crumble later? For the best adhesion effect (adhesion), we take texture paper or origami paper and glue it with decoupage glue over the area of the board on which we will paint with acrylic.
So that the background for the drawing is smooth, and the drawings themselves turn out bright and beautiful, without distortion (the kind we need!), use a needle to remove all the bubbles that appear on the future canvas - we make a puncture in each and remove the air. But even now something is missing to start drawing correctly. Our canvas looks clearly unpresentable. Painting on a fresh canvas is postponed: you need to use canvas primer.
We will use 10-15 layers of decoupage glue as a primer, each of which is applied only after the previous one has completely dried.

The time has come to polish our base, for which we have prepared sandpaper. They do this: lightly moisten the surface of the canvas with water and rub it to the desired gloss. The smoother the first layer of soil, the easier it is to paint on the canvas. Now we need to get a uniformly white background. To do this, we have used whitewash all our lives, we will do the same. Apply, wait for it to dry, and if necessary sand again.

The “canvas” we make contains all the characteristics for creating a painting with your own hands, on which artistic acrylic paints will easily and firmly lie.
Before you start painting with acrylic paints, check out our recommendations:
- The degree of transparency of acrylic paints is adjusted by adding water to them, but if there is more than 20% water, the paint will easily peel off when dry.
- When processing a drawing with paint, you need to start with large details with brushes with high numbers, and only then move on to smaller details, subject to brushes with lower numbers.
- After rinsing the brush after using the color, blot it on a clean cloth or paper napkin; this will protect the painted flowers from unnecessary color stains. When mixing paints, use acrylic thinner.
- When painting, use only the tip of the brush, this will give you a better chance of distributing the paint evenly.
- When mixing, move the colors towards each other, rather than “slipping” one into the middle of the other.
If you need to use a straight line to clearly separate one color spot from another, apply electrical tape or masking tape to the dry area. Afterwards you can easily remove it, and the straight line will remain.

To know how to mix acrylic art paints correctly, the video tutorials below may be useful, where they will explain to you that the best acrylic paints are those that can be used to paint something beautiful. Oh yes! We don’t draw, we write the music of our mood!
How to paint with acrylic (2 videos)
Of the many types of ceiling finishes, painting it is the most economical and popular way. The correct use of acrylic paint, which we will tell you about in this material, allows you to emphasize the quality of the ceiling surface and make it in any color scheme.
The content of the article:
Availability and ease of painting the ceiling acrylic paint is often deceptive: its surface is not always smooth, without stains and streaks. To get a high-quality result from the work, you need to follow the technology for preparing the ceiling for finishing and its coloring, select suitable material and convenient tools.
Properties of acrylic paint for ceilings

Acrylic paint is one of the types of water-based materials. It is a versatile and popular finishing product due to its unique characteristics:
- The material is not afraid of short-term exposure to moisture, so the painted ceiling can be washed.
- Acrylic paint is flexible. This allows, when applied to the surface in 2-3 layers, to cover microcracks in the ceiling.
- A ceiling coated with an acrylic composition is very resistant to ultraviolet radiation and therefore retains its color for a long time.
- Acrylic paint tolerates elevated temperatures well. This allows its use for finishing kitchen ceilings.
- The material does not contain organic solvents, which give many types of paints a characteristic pungent odor.
- The paint is easy to apply to the surface and dries quickly. Therefore, the workflow does not take much time.
- The material is economical in consumption and has an affordable price. Depending on the purpose and quality of acrylic paint, its cost is 250-800 rubles per 1 kg.
- The color palette of acrylic paints for ceilings is very diverse. You can choose any of its shades that will please the eye of the most discerning buyer.
Choosing acrylic paint for painting the ceiling

Acrylic paint should be selected according to its purpose, which is indicated on the packaging of the material. In addition, it contains data on product consumption per 1 m2 of surface, temperature regime and many other indicators that need to be taken into account when purchasing.
Colored acrylic paints are sold in finished form. If there are difficulties in choosing a shade, you can purchase a white material, and give it the desired shade during the work process using soluble pigments, which will have to be purchased additionally.
Acrylic paints can be glossy or matte. The matte surface of the ceiling hides minor defects well and visually increases the height of the room. Glossy paints convenient to use when finishing large surface areas or to create areas on it that are distinguishable by color. In this case, the ceiling must be perfectly flat.
In the production of quality paint and varnish materials The leading companies are Tikkurila, Himaton, Svyatozar, Dulux, Siro Mat Plus and others. It is highly recommended to purchase acrylic paint from one manufacturer from one delivery batch for finishing the ceiling. Materials from different supplies of the same brand can vary greatly in consistency and color.
Tools for painting the ceiling with acrylic paint

To prepare and paint the ceiling with acrylic paint with your own hands, you will need a set of necessary tools and equipment:
- Roller or spray bottle for continuous application of paint and primer compositions;
- Painting ditch-bath for uniform distribution of paint over the working surface of the roller and removal of excess paint;
- Flat paint brush for painting hard-to-reach places: joints between walls and ceilings, ledges and other obstacles that cannot be overcome by rolling a roller;
- Telescopic extension handle for the roller, which makes it possible to work with it from the floor;
- A set of spatulas: one wide, from 250 mm, intended for puttying the ceiling, and the other narrow, up to 80 mm, needed for distributing the gypsum material along the plane of the wide spatula;
- Scraper for cleaning the ceiling from old coating;
- Painting tape for separating sections of the ceiling that are distinguishable by color and protecting the tops of the walls from unwanted paint getting on them;
- Paint brush for initial priming of the ceiling before putting it on.
Cleaning the ceiling before applying acrylic paint

Before work, it is necessary to remove everything unnecessary from the room to be repaired: furniture, equipment, carpets, etc. Otherwise, after finishing the ceiling, all this will be covered with debris, plaster dust and paint splashes. It is recommended to cover the floor and windows plastic film.
The ceiling is removed from the old coating with scrapers until the material of its structure is exposed. To make the work easier, the surface must first be moistened and kept in a draft for some time. The coating layer swollen with moisture will be easier to remove. In this case you can use detergents, but at the final stage the ceiling must be rinsed with clean water.
Particular attention should be paid to removing ceiling grease stains. They cannot be permanently painted over and may appear at any time after final finishing. To combat them, you need to use all available methods, including grinding. base surface ceiling. Its problem areas can be tested by applying 2-3 layers of paint to them. If no stains appear, work can continue.
All irregularities and cracks in the cleaned ceiling are sealed with gypsum putty using a spatula. Concrete sagging and other unnecessary protrusions are knocked down using a chisel and hammer.
Leveling the ceiling with acrylic paint

The ceiling surface is leveled using fine-grained gypsum putty. Before applying it, the ceiling must be impregnated with a primer. It will ensure adhesion of its material to the leveling layer and prevent the formation of fungus.
The putty is diluted in a separate container with water to the desired consistency and thoroughly mixed with a special nozzle attached to the chuck of an electric drill. The proportions of the components for mixing are indicated on the product packaging. The result of the process should be a plastic and homogeneous mixture suitable for work.
Its main part is performed using a wide spatula, which gives a gripping strip of the ceiling surface of at least 250 mm. It is inconvenient to pick up putty from a narrow container with such a tool. Therefore, a narrow spatula is used to collect the material and distribute it on the main tool.
The gypsum composition is evenly distributed on the ceiling, creating a smooth surface. If one layer of putty is not enough to level the ceiling, additional layers are applied until a positive result is achieved. Each of them must be kept until dry.
The final layer of putty is carefully sanded to obtain an ideal surface for painting. The gypsum dust resulting from this work is swept from the ceiling using a cleaning brush.
After grouting the ceiling, it must be coated again with a primer. The resulting film will ensure adhesion of the putty surface to the future paint coating and reduce the consumption of acrylic paint for its creation.
DIY ceiling painting with acrylic paint

The general principle of painting the ceiling is to apply the material from the corner located near the window towards the center of the room.
The operating procedure is as follows:
- Acrylic paint is poured into a paint ditch, the roller is carefully rolled in it, and excess material is removed using the ribbed surface of the tray.
- When working, the roller is held at an angle of 45 degrees; there is no need to put pressure on it, otherwise paint drips cannot be avoided.
- It is convenient to treat areas of the ceiling adjacent to the walls with a small roller, and corners, protrusions and baguettes with a brush. These works are carried out first before completely painting the rest of the surface.
- Further painting of the ceiling with acrylic paint with a roller is done in parallel strips, overlapping each other so that there are no “dry” areas between them, and all the material is evenly distributed over the ceiling plane.
- The second layer of painting is performed in a transverse direction relative to the previous one. Smoothing the joints between the stripes of paint is done with a roller wrung out of the composition. Each applied layer of material is left to dry, so finishing the entire painting in one day is very problematic.
- There is no need to re-paint the covered areas of the ceiling; this is done after drying the previous layer. Otherwise, the different thickness of the coating in some places will be very noticeable.
- If the windows are located in only one of the walls of the room, then the last layer of ceiling painting is applied in a direction perpendicular to their plane. When placing windows in different places The last layer of coating is applied from the walls towards the center of the room.
- The final drying of the ceiling covering is carried out in a natural way without the use of heaters. To do this, after painting is completed, you need to close the windows, preventing drafts and sunlight from entering the room. In this case, they will not force the drying of the coating and disrupt its uniformity in areas of the ceiling.
Acrylic paint is becoming more and more popular every year. It is easy to use and environmentally friendly. Today it is used in many fields of activity: construction, nail services, and creativity. The technique for performing work using this paint can be different. We'll talk about how to use acrylic paints in this article.

Peculiarities
This paint has a number of advantages over other paints and varnishes.
She is appreciated for:
- versatility;
- practicality in application;
- practicality in operation;
- efficiency;
- environmental friendliness.
How to choose?
The choice of paint begins with determining how it will be used: interior, decorative or applied. There are two types of paint composition: organic and synthetic. Each of them is based on artificial resins. Dyes are used to create coloring pigment. Artificial pigments appear in bright and rich colors, and the natural base appears in pastel colors.


As already mentioned, acrylic is a universal type of paint and varnish materials. It can be used in any room. Acrylic dye is not afraid of moisture. You don't have to be a master to carefully cover any surface with it. First of all, buyers choose a material by color, then turn to information about the purpose. It can be found on the packaging. There is permanent paint, for ceilings, for facades or for interior work.


So, there are usually several types of acrylic paints:
- Wear-resistant the paint is recommended for rooms with increased level humidity.
- Deep matte and matte paints are suitable for walls and ceilings in dry rooms. They hide small and insignificant irregularities, are easy to apply and have breathable properties. Before this, you need to remove the whitewash from the ceiling.
- Glossy the paint does not hide unevenness and visually enhances the texture.
The color range of paints is wide. It is possible to make the shade yourself; for this, colors are used. They interfere with White color and create the desired shade. Kohler is a concentrated paint. It can be thick or liquid.

White paint divided into milky white, white and super white. For a purer shade, it is better to use the last two colors.
It is enough to follow the following points to properly mix the paint with the color:
- carefully read the instructions and color chart;
- use paint and colors from the same manufacturer;
- mix them in a separate container;
- You only need to mix the amount that needs to be used for painting. this moment.

Paint for outdoor use used to cover house facades and other outdoor items. Paint for facade works There are two types: water-based and based on organic compounds. The second one is especially good for work with low temperatures V winter period. It lays flat and dries quickly at sub-zero temperatures. Acrylic paint is highly wear-resistant, highly protective and durable, making it suitable for concrete products. The paint protects concrete from the influence of weather conditions and mechanical stress.


Coverage on acrylic base choose for wooden products. It has the following properties:
- resistance to changes in temperature and moisture;
- wear resistance prevents cracks from forming on the wooden surface;
- retains color for ten years;
- it is characterized by vapor permeability;
- dries quickly;
- easy to use;
- no need to scrape off the old layer to apply a new coat of paint.


Artists and designers use acrylic for painting furniture, creating patterns on glass, drawings on fabric and for painting. There is acrylic for children's creativity - this paint is brighter and easier to wash off. It is non-toxic and is stored in plastic jars. There is also paint that has special properties, such as glow-in-the-dark, fluorescent and pearlescent.


Paint for decorative works Available in jars and tubes. Both forms of storage are convenient to use. Paint in tubes can be purchased individually. It is worth noting that jars and tubes of paint come in different sizes. Acrylic fabric paints are distinguished by their elastic properties. When heated with an iron, they acquire a plastic structure and penetrate into the fabric. After dyeing, it is recommended to wash items by hand.

Acrylic paint for nails It is also stored in jars and tubes. The material in the jars is necessary to create a pattern with a brush or using other tools. If necessary, the paint can be diluted with water. Thanks to the narrow spout at the end of the tube, the paints are ready for use immediately. Tubes can also be purchased individually.

Types of surfaces
As already mentioned, acrylic paint has a universal property - it is used on different types of surfaces. Acrylic is “friendly” even with previously painted surfaces. The material fits on without any problems water-based paint, since both coatings are created on the same basis. Acrylic paint can be used over oil paint. In this case, it is necessary to sand the area to be painted to increase adhesion. Acrylic paint also applies smoothly to latex coatings, since they have a similar composition.


The painted surface does not need to be specially prepared. In this case, sanding is only needed to level the walls. Alkyd and acrylic paints are completely different in composition, so it is not recommended to use one coating over the other. It is better to clean off the alkyd paint, prime the surface and apply a new color.

This cleaning process is also suitable for enamel paint. The enamel should be removed from the surface, the wall should be cleaned and the prepared area should be painted with acrylic paint.
Preparation is usually done by sanding and coating various types primers. The soil plays the role of a compactor; it penetrates into surface cracks, creating a more dense structure of the product. Preparing plywood for painting occurs in several stages:
- sanding - at this stage, defects and unevenness are removed using sandpaper, it is important to create a smooth top layer;
- coating with the first layer of primer;
- after drying, it is sanded again to remove small and insignificant irregularities and dust is removed;
- coating with a second layer of primer;
- After complete drying, the plywood is ready for painting


The plastic is prepared as follows:
- removal of dirt and dust;
- grinding - the surface should be rough to increase adhesion;
- Before applying the primer layer, the plastic is degreased with alcohol;
- primer;
- the surface is ready for painting.

Chipboard is prepared in several stages:
- if the chipboard product is a piece of furniture, then it is necessary to unscrew all the fittings;
- if necessary, you need to remove the old layer of paint and varnish material and sand it;
- remove contaminants;
- degrease with white spirit;
- if there are cracks, putty, sand the uneven areas again, remove dirt, and then prime;
- After the primer has completely dried, you can begin painting.


For creating creative interior You can paint the wallpaper in the room. For proper application, several important points should be observed:
- Choose wallpaper for painting. They come in different types. Glass wallpaper is best suited for acrylic dyes.
- The color of the wallpaper may vary, but it is better to choose white wallpaper to obtain bright colors paints.
- You can paint the wallpaper only after the glue has completely dried.
- You can paint using a brush or roller. For textured wallpaper, a spray bottle is more suitable, as it completely paints the wall.


When painting wallpaper, the same rule applies: matte paints hide imperfections, while glossy paints visually enhance the structure.
To prepare for painting concrete, you need to follow several points:
- Check the moisture content of the concrete. If concrete product If it is relatively new (less than a month from the date of manufacture), it should not be painted. Humidity will cause paint to crack and fall off. You can check the humidity level as follows - glue plastic bag 1 m2 in size to the wall using tape. If condensation remains on the film during the day, then such concrete should not be painted.
- If necessary, you need to level the wall using putty in two layers. The second layer should be thin and as even as possible.
- Then you need to sand the walls with sandpaper.
- Apply 2-3 layers of concrete primer, waiting for each layer to dry completely.
- Paint it.


Styrofoam - universal insulation. Sometimes it acts as a finishing surface. This type of plane is not so easy to paint with any paint, but acrylic compositions are very suitable for this. The foam coating must be properly prepared for good adhesion and even painting:
- Clean from dirt and accumulated dust.
- Cover with acrylic primer.
- Polystyrene foam has a very smooth surface, so the primer will flow and create a relief surface. Hence, the point of sanding is very important. Be sure to wait until the primer coat has completely dried.
- The foam is ready for painting.

As described earlier, acrylic paint is not afraid of temperature changes, therefore, it is suitable for painting hot radiators. Such hardware are prepared in compliance with the following rules:
- choose acrylic paint with rust protection or metal paint;
- remove old coating using a wire brush;
- degrease with white spirit;
- Apply primer to the entire area to be painted;
- the surface is ready for painting.

Painting brick walls does not require special skills. The acrylic coating does not bubble or crack when the warm brick structure is exposed to the cold. Brick preparation proceeds as follows:
- clean the surface from dirt;
- You need to grind not only the surface of the bricks, but also between them;
- prime with acrylic primer;
- Check the surface for unevenness and begin painting.

There are special acrylic paints for glass. Glass products are prepared as follows:
- cleaned of contaminants and degreased using alcohol or special solutions;
- then a thin layer of paint is applied;
- to create stained glass, you can use stencils - they are placed under the glass and outlined along the lines with contour acrylic paints;
- The outline dries in 25-30 minutes, after which you can paint it with colored paints. They dry in about 24 hours.

Fibreboard has a porous structure. Therefore, the stages of preparing such material will be as follows:
- clean from dirt;
- polish;
- degrease with white spirit;
- saturate the surface with drying oil (using a paint brush);
- After drying, you can apply paint.


Wooden surfaces are porous materials. When preparing for painting, the following rules should be observed:
- remove the old layer of paint;
- clean from dirt and dust;
- remove all fittings;
- sand with sandpaper or a special tool;
- fill all cracks and irregularities and sand again;
- apply 1-2 layers of primer;
- The wooden product is ready for painting.

Plaster is suitable as a base for wall painting. When painting this surface, you should follow the basic rules of painting: cleaning, sanding, priming, coating.
Required Tools
Acrylic dyes are universal in use. Thanks to its water-based composition, acrylic can be given a more liquid consistency without special solutions. This requires the most simple tools, which are in every home.

What to paint with?
A brush is a universal tool for painting and creating designs. Use wide flat paint brushes to create a solid color. For more complex surfaces (pipe, battery) use a round brush. For drawing, you can use both paint brushes and art brushes. A line brush is a flat brush with short bristles. It is suitable for creating straight lines.
It should be remembered that art brushes for acrylic should be chosen from synthetic or bristles.
There are brushes for manicure. It is recommended to work with such tools in bright light and with a palette. Large flat areas are painted with a roller. It is chosen according to the length and composition of the fur coat. The longer the pile of the fur coat, the more textured the coating will be. For a smooth finish, use felt or nylon rollers. Mini rollers are used when painting corners, joints or transferring a design using a stencil. When working with a roller, use a special tray.

The paint from the spray gun is sprayed widely, so when working you should use protective mask and workwear.
How to paint?
Regular surface painting is feasible for anyone. In this case, you need to follow a number of rules:
- You should cover all areas that cannot be painted with paper or masking tape (windows, floors, baseboards).
- You can prepare the surface and cover it with acrylic paint using a simple pattern from the corners and openings to the center. The corners are painted with a brush or a small roller; for the rest of the area it is better to use a large roller.
- The spray gun is used for painting large surfaces, for example, for the roof of a house, the facade of a building. A spray gun nozzle with a smaller spray angle is used in the room. Paint on water based can be diluted with water in an amount of 10-15% of the total volume.
- Working with color is difficult, it is quite labor-intensive work. Mix paint and colors in a separate container. First, the main color is poured in, and then the color is added in small quantities, portionwise. It is necessary to thoroughly mix the composition until the color is uniform so that streaks do not form.

Facade acrylic paint is best suited for painting facades. The coloring rules are as follows:
- Before painting the facade, you should prepare the surface depending on its type (concrete, wood). Then all places that must be protected from paint are covered. Large areas It is better to paint with a roller or spray gun.
- The choice of facade color depends on the color of the roof of the house. Landscape designers It is recommended to use a combination of brown and green colors to visually create a cozy house made of wood. Experts advise painting the blind area of the house and doors in a dark color. It should be remembered that the house will appear larger if its color is light.

Furniture painting: master class for beginners
Using acrylic paint you can turn an old cabinet into beautiful item interior To do this you need to follow these simple rules:
- After thorough sanding, it is necessary to prime the surface with white acrylic paint.
- We paint the carved inserts on the doors in a contrasting color, for example, black. You can do the carving yourself.
- On the tabletop of the cabinet we draw the design with a roller using a stencil. For people who have a lot of experience with paint, you can sketch the sketch in pencil and color it by hand.

Correct use of manicure paints
Using acrylic paint you can create individual design on the nails. It's very easy to do this:
- after a cosmetic manicure, the nail is covered with the main color of gel polish;
- then the design is applied with acrylic using a special manicure brush;
- After 3 minutes of drying, the surface can be coated with transparent gel nail polish.

The color of the varnish depends on the desired pattern. But there are several basic rules that nail service technicians follow:
- for short nails, dark and bright colors varnish: red, black, burgundy, purple and others;
- for long nails it is better to choose delicate colors and shades: beige, white, pink, milky, etc.
Consumption
Paint consumption is calculated only for painting works. In other cases, these points are not relevant (artwork, nail coating). Consumption is indicated on the packaging. It all depends on the type of paint and manufacturer. You can calculate the required volume by determining the area that needs to be painted. What is important is paint consumption, surface porosity and the number of layers (usually 1-2).

The packaging may indicate a value of 1 l/m2. This means that one liter of paint can paint one square meter area. As a rule, the error is indicated based on the porosity of the surface - 0.1-0.25 l/m2. 0.1/m2 – for a smooth and dense surface, 0.25/m2 – for an absorbent and porous surface.

You should not skimp on paint by diluting it with water. The composition will have a liquid structure, which will create additional layers of stains.
How long does it take to dry?
The coating dries depending on the thickness of the layer, but not for long - most often from several minutes to a day. The paint takes 24 hours to dry when applied extensively and thickly. Paint can dry faster with minimal humidity, warm temperatures and in a ventilated area. The paints take a few minutes to dry.

Repairing painted surfaces is an inevitable process. Even if the finishing was previously done competently and with high-quality materials.
At the moment there are many ways to withdraw old paint.
- Mechanical methods. Acrylic enamel and acrylic paint or other coating are removed with sharp objects or power tools, such as a drill with an attachment.
- Thermal methods. In this case, the paint softens, for example, construction hairdryer, and then deleted.
- Chemical methods. The finish is removed using a variety of removers.
However, the process of removing the old coating is long and labor-intensive. And the price is quite high, especially if you need to remove paint from a large area or complex surfaces. Based on this, many of us prefer to apply a new finish directly to the old one. In this case, the question of compatibility of coatings often arises.
In this article we will talk about whether acrylic paint can be applied to enamel and vice versa. However, first we will understand the basic concepts.
Types of paints and varnishes
The composition of paints and varnishes includes binders, fillers, pigments, solvents/thinners and additives. In order to competently use paint and varnish materials during repairs, you need to know exactly their composition.
Main Components

All paints are divided according to the type of binder used and the type of solvent.
- The binder determines the main qualities of the paint, the service life of the coating and the speed of its drying. There are 4 common types of binders used for paints and varnishes: alkyd and epoxy resins, oil-based (on drying oil), latex, acrylic polymers.
- Solvent components are divided into solvents and diluents.. The former reduce the fluidity and viscosity of the material. Thinners only reduce the viscosity of the paint.
- To improve the characteristics of paints and varnishes, additives are added to their composition.: stabilizers, emulsifiers, fungicides, antiseptics, etc.
- Special paints belong to a separate category. These are anti-corrosion coatings, for example, Zinga electrically conductive paint. Analogs with antiseptic properties that protect the base from mold and rot. Removal compounds small defects(irregularities, scratches, cracks), etc.
Oil and enamel compositions

Materials based on alkyd and acrylic resins include oil and enamel paints. They are suitable for painting metal, wood and plastered surfaces.
After drying, they are non-toxic, light and moisture resistant.
- Oil paints are produced on the basis of drying oil. White Spirit, gasoline, turpentine or solvent naphtha are used as diluents. The compositions are not expensive, but they take a long time (up to several days) to dry. The main disadvantage is that over time the coating turns yellow.
- Varnish is added to enamel compositions as a binder. It gives the coating gloss and aesthetics. The instructions recommend using such paints for exterior paints and on metal, wood, concrete, and plaster. Enamels are moisture and light resistant. They also have anti-corrosion resistance.
Emulsion and dispersion materials

Such paints are diluted, but not soluble with water. In them, the binder and pigment particles are distributed in a liquid medium, creating a stable emulsion.
When the coating dries, it is not washed away by water.
- Emulsion compositions are economical, environmentally friendly and fire safe.
- They fit well on almost any substrate.
- They dry quickly and do not have a pungent odor.
Many people think that water-based and water-dispersion compositions are the same.
However, they are different.
- Matte emulsions wash off over time. The dispersions are waterproof and suitable for use in damp areas.
- Water-dispersion compositions are usually white; water-based analogues have a variety of colors.
- Dispersions cannot be used at temperatures below +5 degrees. However, with the addition of modifiers, they are thermally stable. Such, for example, are fire-retardant paints for metal Polistil.
Note!
The best analogues of water-based paints are based on acrylic resins and polymers.
They have high elasticity and strength.
- Such compositions are frost-resistant after they are completely dry.
- They are vapor permeable.
- Suitable for alkaline substrates (concrete, plaster).
- These paints are tinted very well.
- Resistant to ultraviolet radiation, retains its original color for a long time.
- They have the ability to repel water.
- They have high mechanical stability.
About paint compatibility

Based on everything written above, we will answer the main question of the article - is it possible to paint on enamel with acrylic paint and vice versa.
- Based on their composition, acrylic paints and varnishes can only be applied to the same old coating. They cannot be applied over alkyd enamels due to incompatibility of thinners/solvents. The new coating will simply curl (raise) the enamel.
- In addition, it is not advisable to apply emulsion and dispersion compositions to old ones. The same applies to varnished bases.
- But after emulsion and dispersion materials, you can use any enamels and paints.
Now let’s talk about how to apply a coating of acrylic paint with your own hands without removing the enamel.
Note!
To do this, you need to create an intermediate layer that is resistant to both acrylic and organic solvents in a stable state.
It should consist of polyesters (for example, epoxy resin, polyurethane) with amine hardeners.
Such compounds are dissolved with acetone.

Nowadays many liquid compositions described are sold.
One of the best materials is "Inter Troton Spray".
- First, apply liquid putty over the enamel.
- Next, cover the surface with acrylic primer.
- Then you can paint the base.
Conclusion
If you do not have the opportunity to remove the old paint, then a new coating can be applied to it. However, there are nuances here. Some types of paints and varnishes are incompatible, so between them it is necessary to create an intermediate layer of neutral compounds. By watching the video in this article, you will expand your knowledge base.
When choosing paint for construction work, acrylic-based products are especially popular. After all, this type of paint is characterized by the highest color durability and brightness. We will talk further about the features of application and technology of painting with acrylic paints.
Acrylic paints: origin and manufacturing technology
Acrylic-based paint contains acrylic - this is a polymer substance for the production of which acrylic acid is broken down. For these purposes, water or a technical solvent in the form of ethanol, chloroform and ether is used. This substance is characterized by the absence of color and the presence of a very pungent odor. Acrylic is a synthetic material with a transparent texture. In addition, it has good mechanical characteristics and is resistant to thermal influences.

Among the advantages of acrylic substances are high levels of strength and lightness. Acrylic is resistant to ultraviolet radiation.
In order to make acrylic paint, you will need the presence of acrylic itself; in addition, the paint contains small dispersive parts of plastic, the dispersion is characterized by a tendency to dissolve with water.
After the paint has dried, a film is formed that protects the painted surface and the coloring pigment from external influences.
Any of the acrylic-based paints contains:
- substance, connecting direction;
- fillers;
- coloring pigments;
- solvents;
- additives.
With the help of the first component, all the paint ingredients are connected to each other. In addition, this improves the degree of adhesion of paint to the surface being painted. The material used as a binder is in the form of a polymer dispersion, for the manufacture of which acrylic resins are used. Strength, service life, and resistance to paint abrasion depend on this component. The quality of acrylic paint directly depends on the type of acrylic resin used to make it. With the help of a binder, a structure is provided on which the coloring pigment and other additives are located.

The filler is a composition with which the paint is able to cover the surface that is painted with it. Filler refers to larger parts of acrylic inclusions that increase the viscosity of the paint, its adhesion to the surface, protective characteristics and matting.
With the help of pigment, paint achieves the desired color or shade. This substance is used as a powdery mass of finely dispersed type, which is not able to dissolve in the binder, but is present in the paint in the form a certain color. The following types of pigments are distinguished:
- organic origin;
- inorganic origin;
- piece origin;
- natural pigments.
Using a solvent reduces the viscosity of the paint. Additives act as auxiliary components that change its characteristics,
The technology for manufacturing acrylic-based paints includes the following processes:
- installation of acrylic composition and coloring pigment into the container;
- the process of mixing all components into a homogeneous mass, checking product quality;
- packaging paint into separate containers and preparing it for sale.

Acrylic paint: photos and advantages
1. Environmental safety.
This advantage is achieved by using substances that are harmless to human health in the paint manufacturing process and do not affect human health in any way.
2. Comfort and ease of operation.
Due to the fact that acrylic-based paints are odorless, the ease and convenience of working with them improves.
3. Fire safety.
Acrylic paints are not prone to fire, since they do not contain flammable substances.
4. Unlimited color palette.
A wide variety of colors and shades of acrylic paint allows it to be used not only for painting various kinds designs, but also for creating paintings.
5. Quick drying.
The drying time of acrylic paint is 1-3 hours, depending on the thickness of the layer that was applied to the surface.

6. The qualities of elasticity, strength, ease of maintenance and abrasion resistance - these advantages make acrylic paints quite popular in the construction industry.
7. In addition, dirt does not accumulate on the surface painted with acrylic paint, and the film formed after the paint dries, on the one hand, allows air to pass through, and on the other, is resistant to moisture.
8. Duration of operation of the coating.
Some manufacturers claim that acrylic paints can serve their owners for more than ten years without losing their attractiveness.
9. Wide scope of application.
This advantage is explained primarily by the paints’ resistance to ultraviolet radiation, moisture and mechanical stress. Paints are approved for use in rooms where there is high humidity and outdoors, in direct sunlight.
10. Versatility and versatility.
These characteristics allow the use of acrylic paints in combination with other building materials for finishing premises both indoors and outdoors. Acrylic paints can be applied to almost any type of surface, with the exception of some types of plastic.

Scope of application and technology of using acrylic paints
The use of acrylic paints is associated with both the construction industry and painting. In addition, acrylic paints are used to apply designs to the surface of the car, they are even used for painting on nails.
Before applying acrylic paint to the surface, you should perform the following steps:
- clean the surface from dirt, dust and grease;
- if the material is highly absorbent of moisture, then before painting it is recommended to treat it with a primer;
- Before using paint, carefully check its consistency and, if necessary, dilute it with water or solvent;
- to apply acrylic paint, use a roller, brush or spray gun;
- the minimum air temperature for working with paint is ten degrees Celsius;
- Use plain water to clean brushes, paint containers and other accessories.
If not all of the acrylic paint has been used, it should be stored in a jar with a tightly closed lid, since the entry of air changes its properties and makes it unsuitable for further use.

The main types of acrylic-based paints
Depending on the area of use, acrylic-based paints are:
- external;
- internal;
- automobile;
- used in painting.
Acrylic facade paint contains substances and additives that improve its resistance to ultraviolet radiation, moisture and abrasion. This type of paint is suitable for painting various types of facades, fences, gates and other surfaces located outside the premises.
Interior acrylic paints are less resistant to external stimuli. They fit well on the surface and are different long-term operation. There are separate types of paints intended for painting walls and ceilings. In addition, there are universal compositions that are suitable for work both indoors and outdoors.
Automotive acrylic paints are applied to the body, with their help turning an ordinary car into a real work of art. Paintings are painted using artistic acrylic paints; in addition, a special variety is designed for painting on nails and fabric.
In relation to additional functions, acrylic paints are:
- lightfast;
- moisture resistant;
- resistant to mechanical stress;
- washable.
In relation to gloss, acrylic paints are:
- on a glossy base;
- on a matte basis;
- silky matte;
- semi-gloss.
Depending on the type of surface on which the paint is applied, there are:
- acrylic paints for wood;
- acrylic paint for metal;
- acrylic paint for walls and ceilings;
- universal compositions.
How to dissolve acrylic paint
The first and easiest option for thinning acrylic paint is water. Since it is precisely what is present in acrylic-based paints. However, one should take into account the fact that after drying, it forms protective film, which is waterproof, therefore, you need to clean all tools after work as quickly as possible, before the paint dries.
Another option that will help thin acrylic-based paints is a thinner recommended by the paint manufacturers themselves. With its help, the characteristics of the paint are changed, for example, the painted surface acquires a glossy or matte sheen.
- a one-to-one ratio of paint and water results in an ideal mass that is easy to apply to the surface and is the basic basis for painting;

- painting with paint to which two parts of water have been added allows you to achieve the thinnest layer that evenly impregnates the surface;
- the amount of water with which acrylic paint is diluted depends on the type and thickness of the layer that needs to be obtained; the thinner the layer of paint needed when painting, the more water should be added to the paint.
To dilute dried acrylic paint, grind it thoroughly into a powdery consistency. Next, the container in which it is located is filled with hot boiled water. After the water has cooled, it is drained and the procedure is repeated again. Next, the excess water is drained and the paint is mixed. It is not recommended to paint critical areas of structures using this paint, since it still loses some of its properties. However, for painting an old outbuilding, this is an ideal option.
How to paint with acrylic paint: technology for working with the material
The procedure for painting with acrylic paints is quite simple if you follow all the technological points and subtleties. We suggest that you familiarize yourself with the instructions for painting the ceiling with acrylic paint:
1. First, the surface is prepared for painting. The ceiling should be free of dirt, dust and grease. In addition, the base must be perfectly level. If painting has not been done before, then before applying paint it is recommended to treat the ceiling with a primer, which will not only protect it from mold and mildew, but will also significantly reduce paint costs during its application.
2. If there is old paint on the ceiling, you need to remove it with a spatula. Please note that the presence of small parts of paint on the ceiling during the painting process is unacceptable.
3. If there are cracks or chips on the ceiling, they must be repaired with putty. After the putty has dried, it is grouted, then primed, and only then painted.

4. Before applying paint, care should be taken to prepare tools in the form of a roller, brushes, paint tank, ladder and the paint itself.
5. Start working from the corner areas, working on them with a brush. First, the ceiling around the perimeter is painted. Next, use a roller to paint the rest of the ceiling.
6. The direction in applying the first layer does not matter. But the final painting should be carried out in such a way that the paint is applied in the direction of the window. Thus, the surface will appear perfectly flat and smooth.
Since the drying time of acrylic paint is quite short, one day is enough to paint the ceiling. In addition, acrylic paint is odorless, so it is very popular for interior finishing work.
There are two ways to apply paint to a surface:
- pre-diluted with water or special mixtures;
- in paste form, in which case a special paint thickener will be required.
Please note that the paint should be diluted in a separate container, not in a jar, since the paint, after the moisture evaporates, becomes unusable.
To paint a facade using acrylic paint, follow these steps:
1. Prepare the surface.
There should be no dirt or plaster settling on the facade, the surface should look durable. In addition, you should make sure that there is no fungus on the surface of the walls. If there are cracks or other defects, you should get rid of them.
2. Applying primer.
The next stage involves applying primer to the surface of the façade. After this, the adhesion between the surface to be painted and the paint improves, and the level of paint consumption is reduced.

3. Staining procedure.
Paint is applied manually using a roller and brush, as well as mechanically - using a spray gun. Minimal amount two layers of acrylic paint. Please note that the second coat should be applied only after the first has completely dried.
Acrylic paint video: