Channel cable fastening distance. Basic methods of attaching a cable channel to a wall. This process should be divided into stages
When building a new home or major renovation Electrical wiring is installed inside the walls in a closed manner. These works are accompanied by cutting grooves. What to do when the wall material is not suitable for hiding wires (for example, in wooden bath), don’t want to collect dust or do you need to power a newly installed device?
In this case, the electrical wiring is installed open method. The best option an electrical box will be used. Before attaching the cable channel to the wall, especially on your own, it is advisable to understand all the nuances.
Classification of cable channels
Using a cable channel allows you to fix the cable on a base made of concrete, brick, wood, plasterboard, foam block, stone.
However, the attachment methods will be different.
Depending on the room, the schematic arrangement of the wiring lines and the number of wires in them, it is recommended to use boxes of various types.
Their detailed classification is presented in the table.
The market allows you to select products for specific operating conditions.
The most expensive option are aluminum, the cheapest are plastic. In any case, the latter should be taken, which do not burn, but melt.
Preparation for installation, surface marking
Open installation imposes increased aesthetic requirements: everything must be “smooth and parallel.” In this case, the box is fixed along the preliminary marking lines. It is carried out using a level (laser or water, construction), a square, a tape measure, a marker, a ruler, a pencil (marker).
Installation instructions Install the box according to the marked markings
Here's how to properly divide the process into stages:
- Initially, a wiring diagram is drawn up in the optimal way,
- lines on the wall are drawn using a level, all branches are strictly at right angles,
- on them with a pencil, according to the existing plan, the location is marked distribution boxes, sockets, switches,
- necessary adjustments are made as work progresses.
You can make turns and angles yourself
Rotations and angles can be acquired as in finished form, or make it yourself from a cable channel. Using the former leads to increased costs. But work in difficult areas is accelerated, appearance The routes are better than when using homemade ones.
Self-production will require additional use sealants for sealing seams.
If you have a laser, you don’t have to make markings
Boxes for installation can be cut in advance (for a large area) or during the process. The first case begins with precise measurements using a tape measure along the marking lines.
Then they cut the working material into the required lengths in order to install it later. Accuracy of measurements is important here.
It is easier to carry out the work according to the scheme: try it on - cut it - fasten it.
Drawing straight marking lines and using ready-made components will allow you to attach the cable channel without spoiling the beauty of the room.
Fastening methods
The cable is attached to the wall different ways. The choice of a particular option depends on the composition work surface. The materials used and work with them are discussed in the table.
The procedure for attaching the cable channel to the wall
Before attaching the cable channel to the wall, especially on your own, it is advisable to understand all the nuances and learn the intricacies of the work.
Electrical wiring is usually hidden in the walls, but re-drill them to hide the wires, for example, from a television antenna, router, air conditioner, etc. few people want it. In this case, it comes to the rescue simple design– a cable channel that allows you to reliably hide the wires and, if necessary, get them out.
What is a cable channel?
The usual type of cable channel is a white box of rectangular or square section, but finding a product of a different color or a more rounded shape will also not be difficult.
Cable channels can be made from:
Due to the low price, ease of installation and operation, the latter option is most common. It can be mounted on a wall made of any material.
Often there is a compartment for one cable in floor skirting boards. But because It is not recommended to place more than one wire in a channel; for several wires you will have to buy a multi-channel one.
The cable channel can simply be glued to a wall made of any material. But if there are a lot of wires in the box, then the glue may not withstand the load. In addition, it will be difficult to dismantle such a channel. It will only come loose together with the wallpaper and pieces of plaster. When laying a cable channel of great length, glue can make it possible to make holes for dowels and screws somewhat less often, simplifying and speeding up installation, but you should not completely abandon the more reliable method of fastening with screws.
If you attach it with self-tapping screws or dowels, use nails on the part of the cable channel that will be adjacent to concrete wall, you need to make holes. If you don’t do this and immediately screw the screws into the plastic, it may crack. With a narrow channel, the holes can be placed on the same line, and with a wide channel, they can be placed in a zigzag pattern.
The cable duct is attached to brick, block and concrete walls using dowels. A box with holes pre-drilled in it is applied to the wall, and it is marked through the holes. Next, the cable channel is put aside, holes are drilled with a drill or hammer drill, the base of the box is applied to the attachment point, dowels are inserted (usually 6-8 mm in diameter) and secured with screws.
How to attach a cable duct to drywall? For installation on walls made of wood or covered with plasterboard, there is no need to pre-drill holes in the wall. The cable channel is applied to the wall and the wood screws are screwed in manually. If you plan to have a lot of cables in the box, then for the reliability of the design it is better to use butterfly or screw-in dowels.
For simplicity of work and a neat appearance of the structure when going around corners and turns, it is better to use special elements - internal and external corners, connectors, plugs, rather than cutting the box to the required angle. Minor flaws during installation can be masked with a sealant of a suitable color.
An important rule to follow during installation: the box must fit snugly against the wall along its entire length. On smooth concrete walls, it is enough to fasten it with screws in increments of 40-50 cm, but on an uneven surface they need to be placed more often.
How to attach a cable duct to a wall?
How to attach a cable duct to a wall? Electrical wiring is usually hidden in the walls, but re-drill them to hide the wires, for example, from a television antenna, router, air conditioner, etc. few

It is no coincidence that any person who is not satisfied with the unaesthetic appearance of a wall or floor hung (covered) with twisted wires shows interest in how to attach a cable channel to a wall. In addition, from the point of view of the likelihood of a fire, such harnesses are quite dangerous.
Moreover, they can be mistaken for a toy by small children and pets. And stumbling or clinging to cords gets annoying. Of course, fixed wires are usually hidden in the wall during repairs. But if you, say, bought an air conditioner or gave your child a computer later, when the repairs have already been completed, it’s frankly a pity to ditch a freshly finished surface for the sake of one wire. This is where the electrical box comes to the rescue.
Its main advantages: the ability to install everything yourself, insulation of wires from each other, acceptable appearance of the structure. Moreover, it can be fixed on any type of surface. Concrete, wood, foam block, even metal - everything is suitable.
How to attach a cable channel to a wall? There are 2 main ways. Let's look at both in this article.
A box with a single section and a one-sided lid. Suitable if you need to stretch the cable from the entrance to the apartment to the TV or computer. Or to hide the cord from the air conditioner to the outlet.
Two-section box with double-sided lid. What you need if there are 2 cables going in the same direction.
If there are more wires, you will have to install additional cable channels on top of each other. However, in this case, you can already think about laying a groove - if the connection is stationary, and the owner does not intend to move the devices to which the cables lead.
Sometimes people are confused by the shape of the electrical box. It seems to them rude and does not fit into the interior. I would like to please you: the cable channel can have rounded, soft outlines. It will take a little longer to look for one, but it is not one of the scarce goods.
Very simple to implement, but has significant drawback: if necessary, the cable channel can be removed only with pieces of finishing or even plaster. In addition, if the walls are not very smooth, then uneven gaps will remain between the box and the surface, which is not very attractive visually and is not recommended for use. However, if you are sure that you will not have to dismantle the cable channel, you can use the following instructions.
- The cable channel is cut to size, applied to the wall, floor or ceiling, and compliance with the markings and tightness of joining of individual parts is checked.
- Glue (for example, liquid nails) is applied in a wavy line to the underside of the base of the segment. The width of the wave is approximately 1.5 times the width of the box.
- The element is pressed against the surface for a couple of seconds and immediately removed. The remaining adhesive trace on the wall should thicken a little.
- The channel returns to its place and is pressed, now more firmly, so that it grips the wall.
Often, to enhance reliability, the adhesive is supplemented with hammered nails or screws (depending on the wall material).
A special case of the adhesive installation method can be considered the installation of cable channels, on the base of which an adhesive composition has already been applied. However, this option usually does not inspire confidence among users, and therefore it is also supplemented with self-tapping fasteners.
A little more labor-intensive, but reliable and allows for dismantling. The upper part (cover) is removed from the cut cable channel. The base is applied to the marking and a hole in the wall is drilled directly through it. If the base is reinforced concrete, block or brick, it is easier to do this with a hammer drill.
Hole pitch – from 40 to 50 cm. If the walls are clearly curvature, the distance is reduced so that the mounted box fits tightly to the surface along its entire length. The base is set aside, and the plastic part of the dowels is screwed into the holes. The lower half is put back and fixed with the main part of the fastener.
The wires are laid, the cover is put in place. And the question of how to attach the cable channel to the wall can be considered successfully resolved. You will have to decide for yourself which method you prefer. But advice: choosing glue method, at least occasionally add dowels to it so you don’t have to go back to it again.
How to attach a cable channel to a wall? 2 easy ways
It is no coincidence that any person who is not satisfied with the unaesthetic appearance of a wall or floor hung (covered) with twisted wires shows interest in how to attach a cable channel to a wall. TO

How to attach a cable channel
How to attach the cable duct to the wall depends on the material from which the walls are made. Plastic cable channels can mask minor surface defects, but it is advisable to lay them on a leveled base. There are several main methods of fastening.
This method is suitable for wooden walls or plasterboard partitions. To do this, take special wood screws about 40 mm long. You should not use screws that are too long. The fastening step is usually made equal to 40-50 cm; if there are a lot of wires in the box, that is, the load on it will increase, or the walls are uneven and defects need to be hidden, the step is made smaller. The screws are tightened using a screwdriver. There is no need to make holes in the cable duct or wall before doing this.
Dowel-nails
You can secure the cable duct on a brick or concrete wall using dowel nails. To do this, you need a hammer drill with a 6 mm thick drill.
- First, holes are made in the box itself every 40-50 mm.
This method is also called “quick installation”.
The box can also be attached to a concrete wall using a special gun.
If there is a need to attach a cable duct to metal profile or metal up to 2 mm thick, so-called “bugs” are used - metal screws. The method is similar to fastening using wood screws.
Glue (liquid nails)
Fastening the cable channel with glue is not very reliable; it is used where others cannot be used, for example, for fastening to tiles. You can combine it with others - with fastening with self-tapping screws or dowel-nails.
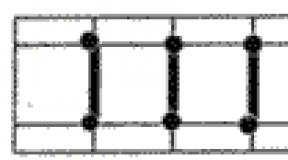
To glue the box to the wall, glue is applied to it in a zigzag line, as in the figure, then pressed against the wall along the markings so that the glue is imprinted on the surface, and removed. After a few minutes, when the liquid nails have set a little (the time depends on the specific type of glue, this can be read in the instructions on the package), the box is pressed firmly against the wall again. Remember that dismantling a cable channel glued to the wall without damaging the coating or the electrical box itself is impossible. The cable can only be laid after the adhesive has completely hardened.
Decoration of corners
When installing electrical wiring in cable channels, you may need to make corner joints in the corners of the room or between the vertical and horizontal parts of the channel on the wall. To make a joint in the corner of a room, the end of the cable channel is cut from the side adjacent to the corner at an angle of 45 degrees. It is better to start installing the cable channel from a corner.
To make the junction of the vertical and horizontal parts, the cable channel is also cut at an angle of 45 degrees, but in a different plane. You can do it another way: cut the lid to the full width of the box. Minor defects can be covered with sealant.
Installation of sockets
To make a cable channel for a socket, socket boxes are attached to the wall next to it. The wires are connected to the outlet after the wires are laid in the box. Then the socket cover is placed on top.
How to lay the cable
To conveniently lay the cable in the electrical box, you can use temporary holders, for example, pieces of a cover. Before installing the cover in place, they are removed. It is convenient to lay the cable and immediately snap the part of the cover over it. It is recommended to start from the corners. Small sections of the cover are installed in the corners, then longer sections are measured and installed on the straight parts of the channel.
Skirting board with cable channel
A plinth with a cable channel is convenient solution, which allows you to simultaneously run a cable channel and create a seam between the wall and the floor.
To find out how long the baseboard you need, accurately measure the perimeter of the room and add 9% to the resulting length for scraps. You will also need accessories: external and inner corners, special connectors, end caps. Profile released standard length- 2.5 m.
The plinth can have a cable channel in the middle or consist of a profile attached to the wall and a plug (upper part); in the second case, the cable channel is located between the profile and the plug.
Regardless of the design, you can install such a plinth in several ways:
- on self-tapping screws,
- for liquid nails,
- on dowels.
You can attach a plinth with a cable duct to drywall using self-tapping screws or glue; in a brick or concrete wall you will need to drill holes and hammer dowels into them. It is recommended to glue the cable channel only when smooth walls: in areas with defects, it may come off after a while. To mask wall defects, it is recommended to additionally secure the baseboard in these places to prevent a gap from appearing.
Unlike a conventional cable channel, you can drill holes in the wall directly through the baseboard. They are placed every 30 cm. To do this, the profile (the upper part or the decorative plug covering the channel must be removed) is pressed against the wall, carefully ensuring that there is no gap between it and the floor. Before attaching the plinth, remove debris with a vacuum cleaner. Press the profile back and insert dowel plugs into the holes, and then screw in the screws with a screwdriver.
To install the plinth on the outer corners, press it against the wall and make a mark at a distance of 3 mm from the corner. Then, following this mark, the profile and the plug are sawed off (for this it is convenient to use a miter box and a hacksaw for metal or wood) and installed on the wall. After laying the plinth, a special corner is placed on the corner. Corners can be with brackets or simply inserted.
It is better to install the baseboard starting from the corner of the room. It is advisable to install entire skirting boards in visible places. If you need to carefully join two sections within a wall, use special plastic connectors. Plugs are placed at the ends.
The plinth makes it possible to distribute wires into groups. For example, wires that do not require frequent access (Internet, cable TV) can be placed under the base of the baseboard. The rest can be placed in a cable channel closed with a plug. In the version with a completely removable top, you can place the wires under and above the rib to which the plug is attached.
Threshold with cable channel
Install a threshold with a cable channel in the space between floor coverings two rooms. Like the baseboard, it consists of a base and a cover. Depending on the model, the base can be mounted using self-tapping screws or be self-adhesive.
Dismantling the cable channel
If the cable channel is damaged or during repairs, it becomes necessary to dismantle it. For this:
- turn off the power supply,
- remove the box cover,
- unscrew the fasteners.
Once the undamaged cable channel has been removed, it can be used again.
Thus, you can install a cable channel with your own hands, without professional skills. It is important to choose a fastening method that matches the wall materials and perform the work carefully.
How to attach a cable channel
How to attach a cable channel How to attach a cable channel to a wall depends on the material from which the walls are made. Plastic cable ducts can mask minor surface defects, but
Today we will talk about how to attach a cable channel to the wall with your own hands. In fact, installing an electrical plastic box is not difficult at all. The main thing is to choose the right mounting method depending on what the walls in the house or apartment are like. Next we will look at everything existing options installation and will provide several important nuances that will allow you to properly fix cable channel on the wall.
Method No. 1 - Self-tapping screws
If you decide to perform either an apartment with plasterboard partitions, then the installation of the cable channel must be done with special wood screws. The fastening step depends on what load will occur on plastic box, or rather, how many wires need to be stretched inside, and what their cross-section is. Typically, to securely secure the cable duct to wooden wall or plasterboard, it is enough to screw screws every 40-50 cm. If the walls are uneven, it is better to reduce the fastening step, this will hide all defects and gaps.
You should not choose screws that are too long to install the cable channel yourself. To securely fix the box in the wall, it will be enough to screw in fasteners about 40 mm long. For screwing, it is best to use a screwdriver with a Phillips bit. We talked about that for home repairs in the corresponding article!
Method No. 2 – Dowel-nails
If you need to attach a cable duct to a concrete or brick wall, which is a typical situation for an apartment and a house, you can’t do without dowel-nails, also called “quick installation”. In addition, for fastening you will need a hammer drill with a 6 mm drill. So, in order to independently fix the electrical box for the cable on a wall made of concrete or brick, you need to perform the following steps:
- Pre-drill 6 mm holes in the bottom of the cable channel every 40-50 cm.
- Attach the box to the wall according to the markings (more on this later) and mark the drilling points that coincide with the finished holes in the cable channel.
- Drill holes according to the marks on the wall.
- Place the plastic box and drive the dowels into the appropriate places.
- Hammer the nails.

Using these simple instructions, you can install the cable duct yourself in a wall made of concrete or brick. We draw your attention to one very important point– do not drill holes with a drill while leaning the box against the wall. When drilling plastic, the impact mode can provoke the appearance of cracks, which will have a negative impact both from the visual side and from the durability of the finished wiring.
Detailed video instructions installation work
Method No. 3 – “Screws with a press washer”
If there is a need to attach a cable duct to metal with a thickness of less than 2 mm or aluminum profile, then for fastening we advise you to use metal screws, also called “bugs”. By the way correct name bedbugs - self-tapping screws with a press washer. They do not require pre-drilling a hole. There is nothing difficult about installing an electrical box on a metal surface; the main thing is to choose good screws and charge the screwdriver.
There is also a special gun with which you can independently attach the cable duct to concrete. Video provided detailed description installation:
We fasten the product with a gun
Method No. 4 – Liquid nails
Well, the last way to attach a cable channel in an apartment or house is with special glue “liquid nails”. The need to glue the cable channel to the wall arises if another installation option is not possible. Most often, liquid nails are used when installing electrical boxes on bathroom tiles or a smooth metal surface. However, it is unlikely that it will be possible to secure the box well with glue alone. Glue mixture more often used as additional option fixation. It can be combined with self-tapping screws or even quick installation.
There are very important nuance fastening the cable channel with glue - first you must apply the adhesive mixture to the surface of the box, and then lean it against the wall according to the markings. As soon as they leaned back wall to the wall, remove it and wait a few minutes for the glue to thicken a little on both surfaces to be glued. After the liquid nails “grab” at least a little, press the cable channel against the wall as hard as possible, the main thing is not to break it. Like this in a simple way You can attach the cable channel with glue yourself.
So, so that you can install the cable channel correctly and at the same time quickly, we recommend that you familiarize yourself with the following installation nuances:

When laying open wiring, cable channels are used in which the wires are laid. The fastening method is selected depending on the wall material (concrete, brick, wood, plasterboard). In this article we will tell you how to attach a cable duct to drywall.
Self-tapping screws
Before attaching the cable duct to the drywall, it is necessary to draw up a wiring diagram. This will help calculate the amount of material and fasteners.
To install the electrical box, you must do the following:
- In accordance with the diagram, future wiring is marked directly on the surfaces;
- Boxes are cut to the required length;
- The cover is removed;
- Holes are made in the base. If the profile is narrow, then they are drilled along one line, and if it is wide, then in two rows in a checkerboard pattern. A distance of 50 cm is maintained between the holes. For plastic products, pre-drilling holes is not required. They can be immediately attached to the wall;
- The cable channel prepared for installation is applied to the surface and secured to the wall through the existing holes with wood screws 40 mm long. Cable channels must be installed level;
- Parts simulating the route are installed. Special attention need to pay attention to the corners;
- The cables are laid in the box so that they do not intertwine. They need to be secured;
- The cable channel is closed with a lid.
In case of significant load, it is better to fasten the structure not with self-tapping screws, but with butterfly dowels.
Jpg" alt=" fastening the cable duct to drywall" width="620" height="374" srcset="" data-srcset="https://remontcap.ru/wp-content/uploads/2017/10/poryadok-rabot-1024x617..jpg 300w" sizes="(max-width: 620px) 100vw, 620px">!} 
Data-lazy-type="image" data-src="https://remontcap.ru/wp-content/uploads/2017/10/988_image009.jpg" alt=" fastening the cable duct to drywall" width="700" height="560" srcset="" data-srcset="https://remontcap.ru/wp-content/uploads/2017/10/988_image009..jpg 300w" sizes="(max-width: 700px) 100vw, 700px">!} 
Glue mount
There is another way to secure a cable channel to drywall. Can be used assembly adhesive("liquid Nails"). In this way you can only fix plastic products because they are very light. It should also be laid minimal amount cables so as not to create large loads.
To secure a cable duct to a plasterboard surface using adhesive, you need to perform the following steps:
- Markings must be made on the surfaces where the wiring will pass;
- The profiles are cut into pieces of the required length;
- The cover is removed from the electrical channel;
- “Liquid nails” are applied to the back of the profile along a zigzag line, which will provide the largest adhesion area;
- The profile is carefully applied to the surface without gluing, so that the glue is imprinted on the installation site;
- After a few minutes, when the glue thickens a little, the box is again applied to the wall and pressed with force and held for a while so that the glue sets;
- After the “liquid nails” have completely dried, the cable is laid;
- Then you need to attach the cover.
For additional fixation, in some places the cable channel can be fastened with self-tapping screws or nails.
Jpg" alt=" fastening the cable duct to drywall" width="900" height="900" srcset="" data-srcset="https://remontcap.ru/wp-content/uploads/2017/10/1239_image003..jpg 150w, https://remontcap.ru/wp-content/uploads/2017/10/1239_image003-300x300..jpg 200w" sizes="(max-width: 900px) 100vw, 900px">!} 
During the construction of a house, electrical wiring is installed in a hidden way, under plaster. A complete replacement of the electrical wiring is usually carried out during a major overhaul. In this case, grooves are made in the wall, into which the wire is laid.
But what to do when there is no opportunity or desire to engage in dusty wall slitting? Or do you need to connect a recently installed powerful electrical appliance, such as a water heater? In this case, many choose the open method of laying electrical wiring, and fastening to the wall is carried out using a cable channel.
Types of cable channels
Several criteria are used to classify a cable channel:
- Size. There are small products for laying one small-section wire or box large sizes, designed to mount up to eight conductors of various cross-sections on the wall;
- Material of manufacture. They produce aluminum, steel and plastic structures. For indoor installation, plastic models are more in demand, and fastening steel and aluminum boxes is more often used when laying electrical wiring along the facade of a house;
- Location. The cable channel can be fastened in several places. The design of the product is maximally adaptable depending on the installation location. There are plinth, parapet, main and floor models.
Note! By color design The cable channel most often has a neutral White color, suitable for any finish. Models that imitate a wooden structure are also popular.

Installation technology
The main advantage of cable channel for open wiring– this is ease of installation. At the same time, the structure can be fixed on any surface: wall, floor or ceiling. Greater value has a surface material: the method of best fastening depends on this. Let's consider the main installation options, as well as the types of surfaces to which the channel cable is attached.
Surface marking
Before you begin to attach the cable channel, you need to make markings on the surface: the location of the electrical wiring boxes is marked on the wall. This can be done with a pencil or chalk and a building level. It is important to maintain horizontal and vertical lines, since after installation the unevenness of the gasket will be evident.

Self-tapping installation
To secure the box to a wooden wall, use ordinary self-tapping screws. The recommended length is 2-3 cm. This method is suitable for wooden houses, baths and other buildings. Self-tapping screws are also suitable for walls covered with wooden clapboard.
When performing installation, holes are pre-drilled in the bottom of the box, into which self-tapping screws are then screwed. IN plastic structures holes can be made directly with a self-tapping screw when fastening. Optimal distance between installation points is 30–50 cm, depending on the expected load on the cable channel (the number of electrical wires placed in the box).
Fastening with dowels
Installation of cable channels on concrete surface requires a more serious approach and additional tools. To do this you will need plastic dowels and a hammer drill or hammer drill to make holes in a concrete wall. This method is suitable for installing any profile: both metal and plastic, in interior spaces or outside the building. The order of work is as follows:
- Holes for fastening are drilled at the bottom of the box. The distance between them, as in the previous version, is 30–50 cm;
- Then the cable channel is applied to the wall along the previously marked line;
- Using an awl or nail, the location of the fasteners is marked on the wall surface;
- Then, using a puncher, holes of the required diameter are drilled along the marks in the wall, into which plastic dowels are driven;
- After this, all that remains is to secure the profile using self-tapping screws.
To secure the electrical wiring box to a concrete surface, you can also use dowel nails, which are driven in with a hammer. But this option has a significant disadvantage - if it is necessary to move the structure, certain problems arise with dismantling such dowels.

Glue method
Another option for securing the cable channel is to use mounting adhesive for fixation. Most often, the adhesive composition “liquid nails”, produced under the Moment brand, is used for these purposes. This glue is available in tubes under mounting gun or in ordinary tubes for manual application.
The adhesive installation method is used for attaching cable channels to plasterboard, PVC wall cladding (plastic lining or panels), as well as in bathrooms on ceramic tiles. It is worth noting that only plastic wiring boxes are suitable for this method, since their weight is minimal. It is also desirable that the number of wires laid in the cable channel be minimal and do not create significant loads on the structure.
The technology of the adhesive fixation method is as follows:
- An adhesive is applied to the back of the profile. To ensure maximum adhesion area, the glue is distributed in waves;
- Then the cable channel is carefully applied to the wall along the marking line and immediately removed;
- After 2–3 minutes, when the glue has begun to dry, the strip is reapplied and pressed firmly for several minutes.
After the adhesive has completely set, additional fixation is performed in problem areas. For fastening, use small screws or hammer nails.
To facilitate profile connection, use those offered by the manufacturer additional elements: T-shaped and corner structures, strip connectors, various bends and other accessories.
To install sockets and switches, it is best to use overhead versions of these products or use box models with built-in structures.
Separately, we note that the installation of external electrical wiring is carried out last, after all finishing works.
Basic methods of attaching a cable channel to a wall
Today we will talk about how to attach a cable duct to a wall with your own hands. In fact, installing an electrical plastic box is not difficult at all. The main thing is to choose the right mounting method depending on what the walls in the house or apartment are like. Next, we will look at all existing installation options and provide several important nuances that will allow you to properly secure the cable channel to the wall.Method No. 1 - Self-tapping screws
If you decide to install electrical wiring in wooden house or an apartment with plasterboard partitions, then the installation of the cable channel must be done with special wood screws. The fastening step depends on what load will be placed on the plastic box, or more precisely, how many wires need to be stretched inside, and what their cross-section is. As a rule, to securely fasten a cable channel to a wooden wall or drywall, it is enough to screw screws every 40-50 cm. If the walls are uneven, it is better to reduce the fastening step, this will hide all defects and gaps. 
You should not choose screws that are too long to install the cable channel yourself. To securely fix the box in the wall, it will be enough to screw in fasteners about 40 mm long. For screwing, it is best to use a screwdriver with a Phillips bit. We talked about how to choose a screwdriver for home repairs in the corresponding article!
Method No. 2 – Dowel-nails
If you need to attach a cable channel to a concrete or brick wall, which is a typical situation for an apartment or a house, you can no longer do without dowel nails, also called “quick installation”. In addition, for fastening you will need a hammer drill with a 6 mm drill. So, in order to independently fix the electrical box for the cable on a wall made of concrete or brick, you need to perform the following steps:
- Pre-drill 6 mm holes in the bottom of the cable channel every 40-50 cm.
- Attach the box to the wall according to the markings (more on this later) and mark the drilling points that coincide with the finished holes in the cable channel.
- Drill holes according to the marks on the wall.
- Place the plastic box and drive the dowels into the appropriate places.
- Hammer the nails.

Using these simple instructions, you can install the cable channel in a wall made of concrete or brick yourself. We draw your attention to one very important point - you should not drill holes with a drill while leaning the box against the wall. When drilling plastic, the impact mode can provoke the appearance of cracks, which will have a negative impact both from the visual side and from the durability of the finished wiring.
Method No. 3 – “Bedbugs”
If there is a need to attach a cable channel to metal less than 2 mm thick or an aluminum profile, then we advise you to use metal screws, also called “bugs,” for fastening. There is nothing difficult about installing an electrical box on a metal surface; the main thing is to choose good screws and charge the screwdriver.
There is also a special gun with which you can independently attach the cable duct to concrete. The video provides a detailed description of the installation:
We fasten the product with a gun
Method No. 4 – Liquid nails
Well, the last way to attach a cable channel in an apartment or house is with liquid nails using special glue. The need to glue the cable channel to the wall arises if another installation option is not possible. Most often, liquid nails are used when installing electrical boxes on bathroom tiles or a smooth metal surface. However, it is unlikely that it will be possible to secure the box well with glue alone. The adhesive mixture is often used as an additional fixation option. It can be combined with self-tapping screws or even quick installation.
There is a very important nuance in attaching the cable channel with glue - first you must apply the adhesive mixture to the surface of the box, and then lean it against the wall according to the markings. Once you have the back panel against the wall, remove it and wait a few minutes for the glue to thicken a little on both surfaces to be glued. After the liquid nails “grab” at least a little, press the cable channel against the wall as hard as possible, the main thing is not to break it. In this simple way you can attach the cable channel to glue with your own hands.
So, so that you can correctly and at the same time quickly install the cable channel, we recommend that you familiarize yourself with the following installation nuances:

That's all you need to know about how to attach a cable duct to a wall with your own hands. We hope that the provided detailed description with photos and video examples was useful for you!
Also read:
Detailed video instructions for installation work
We fasten the product with a gun
How professionals do it - video review
samelectrik.ru
The procedure for attaching the cable channel to the wall
When building a new house or major renovation, electrical wiring is installed inside the walls in a closed manner. These works are accompanied by cutting grooves. But what to do when the wall material is not suitable for hiding wires (for example, in a wooden bathhouse), there is no desire to create dust, or you need to power a newly installed device?
In this case, the electrical wiring is installed in an open manner. The best option would be to use an electrical box. Before attaching the cable channel to the wall, especially on your own, it is advisable to understand all the nuances.
Classification of cable channels
 Using a cable channel allows you to fix the cable on a base made of concrete, brick, wood, plasterboard, foam block, stone.
However, the attachment methods will be different.
Depending on the room, the schematic arrangement of the wiring lines and the number of wires in them, it is recommended to use boxes of various types.
Their detailed classification is presented in the table.
| installation location | floor | in their shape and appearance they are optimally adapted to the installation location; |
| main | ||
| plinth | ||
| color | are issued different colors and shades | fit harmoniously into the interior of the rooms |
| size | different channel volumes - for one, 2, 3 or more cables | dimensions from 12×12 to 100×60 mm; have different shapes corners - from sharp to rounded |
| number of locks | with one | 2 latches – more securely hold the cover on the channel, reducing the possibility of deformation; |
| with two | ||
| product material | aluminum | covered with film; a variety of shades gives an attractive look; fireproof |
| steel | installed indoors or outdoors; Available with a galvanized surface in different colors; do not burn; susceptible to corrosion when scratched |
The market allows you to select products for specific operating conditions. 
The most expensive option is aluminum, the cheapest is plastic. In any case, the latter should be taken, which do not burn, but melt.
Preparation for installation, surface marking
Open installation imposes increased aesthetic requirements: everything must be “smooth and parallel.” In this case, the box is fixed along the preliminary marking lines. It is carried out using a level (laser or water, construction), a square, a tape measure, a marker, a ruler, a pencil (marker).
 Installation instructionsInstall the box according to the marked markings
 Here's how to properly divide the process into stages:
- Initially, a wiring diagram is drawn up in the optimal way;
- lines on the wall are drawn by tapping according to the level, all branches are strictly at right angles;
- on them, with a pencil, according to the existing plan, the location of distribution boxes, sockets, switches is marked;
- necessary adjustments are made as work progresses.
 You can make turns and angles yourself
 Turns and corners can be purchased either ready-made or made from cable duct yourself. Using the former leads to increased costs. But work on difficult sections is faster, and the appearance of the route is better than when using homemade ones.
Self-production will require the additional use of sealants to seal seams.
 If you have a laser, you don’t have to make markings
 Boxes for installation can be cut in advance (for a large area) or during the process. The first case begins with precise measurements using a tape measure along the marking lines.
Then they cut the working material into the required lengths in order to install it later. Accuracy of measurements is important here.
It is easier to carry out the work according to the scheme: try it on - cut it - fasten it.
Drawing straight marking lines and using ready-made components will allow you to attach the cable channel without spoiling the beauty of the room.
Fastening methods
The cable channel is attached to the wall in various ways. The choice of a specific option depends on the composition of the working surface. The materials used and work with them are discussed in the table.
| using self-tapping screws | wood screws are screwed in with a screwdriver on average every 50 cm; It is recommended to use them with a length of about 40 mm; used for quick installation of plastic channels; no pre-drilling required | |
| dowel-nails (quick installation) | the lid is removed from the box; holes are drilled in it in increments of about 45 cm; it is adjusted to the surface, marking the location of the drilling points on it; use a hammer drill to make a hole in the wall; the plastic part of the nail is inserted through the box into the hole, the metal part is then hammered in | allows you to securely attach it to a concrete wall, brick, stone |
| "bugs" | screwed with a screwdriver through the distance indicated above | thin metal (less than 2 mm) |
| glue (liquid nails) | apply the adhesive inside out the prepared section; lean it against the marked place for a few seconds, move it away; wait for the glue to thicken; pressed back; additionally it is required to use dowels and screws | wood, drywall, wallpaper, tiles, can also be glued to a concrete surface |
The first 3 methods provide the ability to dismantle the elements intact, and the 4th - only with fragments of finishing. The installed box looks great only on smooth walls.
 It is recommended to install wiring in the cable channel after all finishing work has been carried out (pasting wallpaper, applying decorative plaster).
At this method The laying of lines complies with the rules of the PUE, it is easy to get to the place of the problem.
The presented fastening options reliably join the surfaces. The variety of materials fits the routes into the apartment's decor.
moyastena.ru
How to attach a cable channel to a wall? 2 easy ways
It is no coincidence that any person who is not satisfied with the unaesthetic appearance of a wall or floor hung (covered) with twisted wires shows interest in how to attach a cable channel to a wall. In addition, from the point of view of the likelihood of a fire, such harnesses are quite dangerous. Moreover, they can be mistaken for a toy by small children and pets. And stumbling or clinging to cords gets annoying. Of course, fixed wires are usually hidden in the wall during repairs. But if you, say, bought an air conditioner or gave your child a computer later, when the repairs have already been completed, it’s frankly a pity to ditch a freshly finished surface for the sake of one wire. This is where the electrical box comes to the rescue.Its main advantages are: the ability to install everything yourself, insulation of wires from each other, acceptable appearance of the structure. Moreover, it can be fixed on any type of surface. Concrete, wood, foam block, even metal - everything is suitable.
How to attach a cable channel to a wall? There are 2 main ways. Let's look at both in this article.

What you need to know about cable channels
(banner_content)Electrical boxes differ in several ways. For starters, this is the material from which they are made:
- steel. Suitable for both indoor installation and protection of cables outside buildings. The outer surface is galvanized. Boxes are produced different colors, which allows you to choose the most harmonious one in your case. Does not burn. The disadvantages are the high price and corrosion when scratching;
- aluminum. These, by definition, do not rust, have a very elegant appearance, and, of course, are fire resistant. Good for everyone, but again - expensive;
- plastic. They are usually used in home wiring. They are plastic, serve for a long time, the color range allows them to be almost invisible in general interior. However, plastic cannot resist fire. Therefore, when choosing a cable channel, you should take an interest in the physical characteristics of its material and choose one that does not burn, but melts, and in this process emits a minimal amount of harmful substances.
The next thing you need to pay attention to is the cable channel arrangement. According to the rules of electrical installation, a separate cell must be allocated for each wire. This is especially important if both power and low-current wires are hidden in one box. They should not contact - this leads to signal attenuation. Based on this, we select a cable channel of one of the types described below.
A box with a single section and a one-sided lid. Suitable if you need to stretch the cable from the entrance to the apartment to the TV or computer. Or to hide the cord from the air conditioner to the outlet. Two-section box with a double-sided lid. What is needed if there are 2 cables going in one direction. If there are more wires, you will have to install additional cable channels on top of each other. However, in this case, you can already think about laying a groove - if the connection is stationary, and the owner does not intend to move the devices to which the cables lead. Sometimes people are confused by the shape of the electrical box. It seems to them rude and does not fit into the interior. I would like to please you: the cable channel can have rounded, soft outlines. It will take a little longer to look for one, but it is not one of the scarce goods. 
Installation of cable channels: preparation Most often, difficulties arise when designing corners and turns. Here you can choose one of the available options:
- cut the elements joining at the turn at an angle of 45 degrees, and after installation is completed, cover the seam gap with a sealant of a suitable color. If the cable channel turns around the corner of the room, it is cut at a right angle (as a result of which the wires become visible at the turn), and the joint is closed with a plug;
- buy the appropriate turn signals and corners. Installation, even homemade, will increase the cost somewhat due to the cost of Consumables. But installation in difficult places is greatly simplified, and the end result looks much more elegant.
- The cable channel is cut to size, applied to the wall, floor or ceiling, and compliance with the markings and tightness of joining of individual parts is checked.
- Glue (for example, liquid nails) is applied in a wavy line to the underside of the base of the segment. The width of the wave is approximately 1.5 times the width of the box.
- The element is pressed against the surface for a couple of seconds and immediately removed. The remaining adhesive trace on the wall should thicken a little.
- The channel returns to its place and is pressed, now more firmly, so that it grips the wall.
 A little more labor-intensive, but reliable and allows for dismantling. The upper part (cover) is removed from the cut cable channel. The base is applied to the marking and a hole in the wall is drilled directly through it. If the base is reinforced concrete, block or brick, it is easier to do this with a hammer drill.
 The pitch of the holes is from 40 to 50 cm. If the walls are clearly curvature, the distance is reduced so that the mounted box fits tightly to the surface along its entire length. The base is set aside, and the plastic part of the dowels is screwed into the holes. The lower half is put back and fixed with the main part of the fastener.
The wires are laid, the cover is put in place. And the question of how to attach the cable channel to the wall can be considered successfully resolved. You will have to decide for yourself which method you prefer. But advice: when choosing the adhesive method, at least occasionally add dowels to it, so as not to return to this again.
When building a new house or major renovation, electrical wiring is installed inside the walls in a closed manner. These works are accompanied by. But what to do when the wall material is not suitable for hiding wires (for example, in a wooden bathhouse), there is no desire to create dust, or you need to power a newly installed device?
In this case, the electrical wiring is installed in an open manner. The best option would be to use an electrical box. Before attaching the cable channel to the wall, especially on your own, it is advisable to understand all the nuances.
Classification of cable channels
 Using a cable channel allows you to fix the cable on a base made of concrete, brick, wood, plasterboard, foam block, stone.
However, the attachment methods will be different.
Depending on the room, the schematic arrangement of the wiring lines and the number of wires in them, it is recommended to use boxes of various types.
Their detailed classification is presented in the table.
| Classification feature | Kinds | Description |
|---|---|---|
| installation location | floor | in their shape and appearance they are optimally adapted to the installation location; |
| main | ||
| plinth | ||
| color | Available in different colors and shades | fit harmoniously into the interior of the rooms |
| size | different channel volumes - for one, 2, 3 or more cables | dimensions from 12×12 to 100×60 mm; have different shapes of corners - from sharp to rounded |
| number of locks | with one | 2 latches - more securely hold the cover on the channel, reducing the possibility of deformation; |
| with two | ||
| product material | aluminum | covered with film; a variety of shades gives an attractive look; fireproof |
| steel | installed indoors or outdoors; Available with a galvanized surface in different colors; do not burn; susceptible to corrosion when scratched |
The market allows you to select products for specific operating conditions.
The most expensive option is aluminum, the cheapest is plastic. In any case, the latter should be taken, which do not burn, but melt.

Preparation for installation, surface marking
Open installation imposes increased aesthetic requirements: everything must be “smooth and parallel.” In this case, the box is fixed along the preliminary marking lines. It is carried out using a level (laser or water, construction), a square, a tape measure, a marker, a ruler, a pencil (marker).
 Installation instructions
  Install the box according to the markings
 Here's how to properly divide the process into stages:
- Initially, a scheme is drawn up in an optimal way;
- lines on the wall are drawn by tapping according to the level, all branches are strictly at right angles;
- on them, with a pencil, according to the existing plan, the location of distribution boxes, sockets, switches is marked;
- necessary adjustments are made as work progresses.
 You can make turns and angles yourself
 Turns and corners can be purchased either ready-made or made from cable duct yourself. Using the former leads to increased costs. But work on difficult sections is faster, and the appearance of the route is better than when using homemade ones.
Self-production will require the additional use of sealants to seal seams.
 If you have a laser, you don’t have to make markings
 Boxes for installation can be cut in advance (for a large area) or during the process. The first case begins with precise measurements using a tape measure along the marking lines.
Then they cut the working material into the required lengths in order to install it later. Accuracy of measurements is important here.
It is easier to carry out the work according to the scheme: try it on - cut it - fasten it.
Drawing straight marking lines and using ready-made components will allow you to attach the cable channel without spoiling the beauty of the room.
Fastening methods
Performed in various ways. The choice of a specific option depends on the composition of the working surface. The materials used and work with them are discussed in the table.
| Fastening method | Operating procedure, tips | Mounting surface |
|---|---|---|
| using self-tapping screws | wood screws are screwed in with a screwdriver on average every 50 cm; It is recommended to use them with a length of about 40 mm; used for quick installation of plastic channels; no pre-drilling required | |
| dowel-nails (quick installation) | the lid is removed from the box; holes are drilled in it in increments of about 45 cm; it is adjusted to the surface, marking the location of the drilling points on it; use a hammer drill to make a hole in the wall; the plastic part of the nail is inserted through the box into the hole, the metal part is then hammered in | allows you to securely attach it to a concrete wall, brick, stone |
| "bugs" | screwed with a screwdriver through the distance indicated above | thin metal (less than 2 mm) |
| glue (liquid nails) | apply the adhesive inside out the prepared section; lean it against the marked place for a few seconds, move it away; wait for the glue to thicken; pressed back; additionally it is required to use dowels and screws | wood, drywall, wallpaper, tiles, can also be glued to a concrete surface |
The step width is adjusted based on surface unevenness. For more information on how to select and install a cable channel, watch this video:
The first 3 methods provide the ability to dismantle the elements intact, and the 4th - only with fragments of finishing. The installed box looks great only on smooth walls.
 It is recommended to install wiring in the cable channel after all finishing work has been carried out (pasting wallpaper, applying decorative plaster).
With this method of laying lines, the rules of the PUE are observed, and you can easily get to the place of the problem.
The presented fastening options reliably join the surfaces. The variety of materials fits the routes into the apartment's decor.